Building An Enterprise on SUSE/openSUSE - EP 04 - Virtualization and Kubernetes
This is article four on a series of designing and enterprise ecosystem on SUSE/openSUSE. This article will only reference the openSUSE and/or non-commercial options directly, but as with all SUSE sponsored projects the information can be directly applied to the SUSE Enterprise Linux and SUSE supported versions directly.
Note: This article is long, and covers the theory, practical examples, and practical implementation of a virtualization and Kubernetes implementation. Please skip to the appropriate sections as needed.
Options - Tradeoffs and Compromises
SUSE and openSUSE share the same ecosystem of choices for managing virtualization, and both come with some pretty severe tradeoffs depending on your regulatory environment. Both SUSE and openSUSE support implementing XEN and KVM on the operating system level with SLES/SLED and openSUSE Leap/Tumbleweed/MicroOS, and this can be managed individually on each machine, or with a management tool like Uyuni/SUSE Manager.
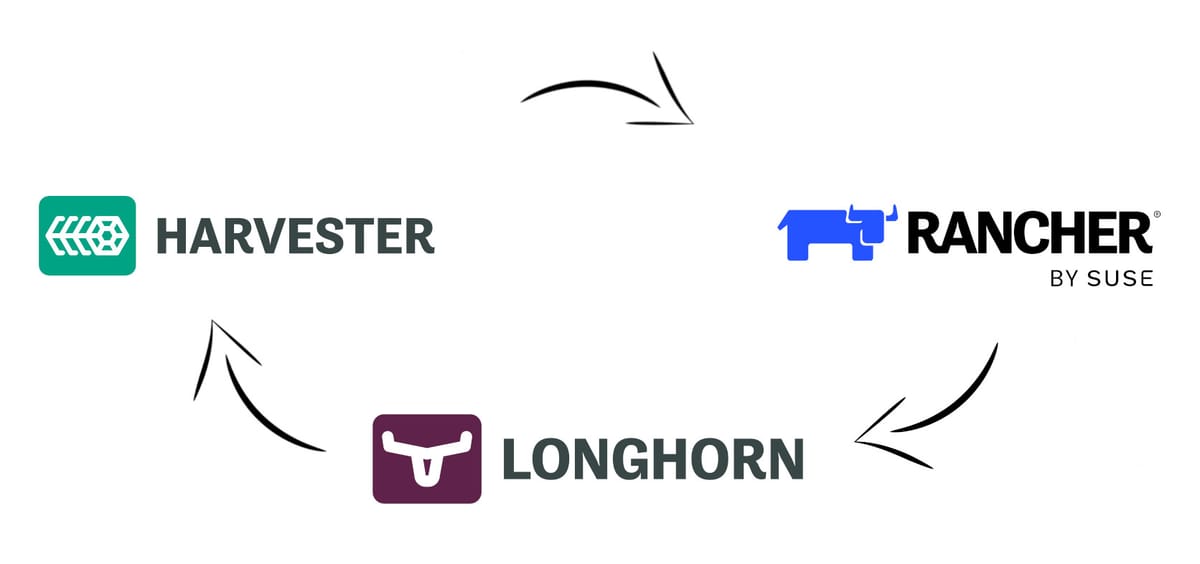
With that said, most of these solutions are part of an aging infrastructure that has not been a top priority over the recent years, as SUSE has been investing in a different open source stack of Rancher, Harvester, and Longhorn. This stack focuses on Kubernetes first management and deployment, with virtual machines managed through KubeVirt and both containers and VMs managed from a single management interface.
Those of you who shuttered at the though of using KVM over XEN and/or work in environments where KVM is not a secure or reliable enough solution, you can get by on systems managed with UYUNI/SUSE Manager utilizing XEN, but you will be better served by solutions like XCPNG and XEN Orchestra. For the rest of us in standard environments, I welcome you to a stable and balanced implementation of tooling that makes your VM and Kubernetes management slightly less painful than unpacking a tar ball.
Components
- Longhorn
- Harvester
- Rancher
- RKE2
Longhorn - Persist, Persistence, Persisted
Longhorn is the persistence engine we deserve. It tracks and manages redundancy across VMs, containers, and pods. This management can be invisible to you as a user if you're just using VMs, but as you grow into Kubernetes this management will become a primary feature to persist data throughout your container deployments. There are two primary use cases of Longhorn in this deployment:
- VMs
Longhorn is invisible to you, but manages redundancy seamlessly. This lets you add and remove nodes without worrying about losing data, and recover from downed nodes seamlessly as the data is re-synced across nodes. This can induce some paranoia at first for those of us who come from XEN where node by node data storage is common or even default, but let me reiterate:
I have personally unplugged 2 out of 3 nodes in a production cluster with no advanced configurations, and had everything restart on the remaining node in less than a minute. The data management is solid and stable, and probably my favorite feature (yes I also love XO-SAN, but I hate having to set it up). - Kubernetes
You will have to do manual configurations, but it also manages the redundancy the same as for VM users once you setup a volume. The data redundancy allows for an incredible level of stability even when you loose entire active nodes.
Harvester - Virtual Machines Only
Harvester is a Kubernetes based Hypervisor, expressly designed to not run your containers. This can seem antithetical to those who come from solutions like Talos, as it is really convenient to run VMs and containers on the same machine, but lets go over the reason for this intentional design choice.
Fundamentally this is a tradeoff of security vs usability. It is very convenient to run containers on the same kernel that is hosting a VM, as it is one OS to run everything. But while it is convenient it skips some of the technical realities of containers versus virtual machines and can lead to some severe security impacts. To understand this lets follow this chain of reasoning:
- Kubernetes is an orchestration tool for containers.
- Containers are a way to run a process inside of a separate name space in a specific directory
- Escaping a container and exiting into the name space/user space is a common security risk for containerized work loads
- Once exited into the user space, privilege escalation can be performed to gain privileges over VMs and other containers on the machine that was also running that container.
This reasoning identifies a significant and reasonable risk to avoid in any workload, but especially in large workloads that would typically be commingled in a business environment leveraging Kubernetes and Virtual Machines. For this reason it is best to separate the needs of VM environments and the needs of container environments to ensure that typically less secure workloads on Kubernetes do not compromise the typically more secure workloads in VMs.
So then why is Harvester still based on Kubernetes?
Because Harvester utilizes the power of Longhorn to manage persistence of data between your virtualization nodes, and then KubeVirt to manage KVM virtual machines like Kubernetes objects to ensure they are persisted correctly, and manageable in a simple way. This ensures that data storage, and fail over is a consideration in the design, but is not a configuration necessity for baseline operations. This separation still has compromises with smaller systems, and if you are running in two or three node layouts, you should dig deeper in other articles to understand these tradeoffs, but overall this solution architecture results in better stablity and managability at both small and large scale.
Rancher - Rodeo Adds for All!
If you've been in IT for more than a month, you have been invited to a SUSE Rancher Rodeo. Additionally, you've also been confused on why it matters, what it does, and probably also asked the question "How do you say SUSE?". Put simply, Rancher is a management engine for Kubernetes, wherever the cluster is, and however many nodes, Rancher is there to give you a user interface and user manager for the cluster.
Now the really aggravating part of Rancher in the world for those of us who only really wanted a hypervisor. Rancher is the management tool for anything advanced in Harvester, this includes multiple user management, and integration with IDM solutions. This can be annoying for those who come from something like Proxmox, but it is a standard design for the majority of virtualization solutions.
RKE2 - The Kubernetes Powerhouse
Do you need FIPS, CVE scanning, and defaults or configuration for CIS Kubernetes Benchmarks v1.7 or v1.8? Whether you do or not, RKE2 has it, and it is fantastic. The name is short for Rancher Kubernetes Engine Version 2 (aka Rancher Kubernetes Engine Government), and it is designed to meet strict security standards while also being super easy to deploy and manage.
RKE2 is the backbone of this system design as it is used as the base of Harvester, and will be used for the demonstration for deploying a complete system for this design later in this article. It is not a major concern if you don't understand what most of this means, but it is important for you to understand the Kubernetes implementation at use in your environment.
Installing Harvester (Primary/Control Node)
You need at least one server, two servers if you want fail over, and three servers for HA failover. If you come from traditional HA/fail over systems, this can be strange since you typically need three nodes to mediate a time differential or a discrepancy in the heartbeat. In the case of Harvester, this is solved in a slightly different way, which results in nominally stable deployments on two nodes, with three nodes being ideal but not required. This introduces different management issues from other HA methodologies, such as split brain, and the more advanced need for a round robin dns entry for the control plane, but in VM workloads where you typically do more direct management it works reasonably well.
Now with the hardware worked out, download the ISO for SUSE Harvester from GitHub. Ensure you have downloaded the latest stable release, as development and release candidates are listed first, and do not have supported upgrade paths.
DO NOT SKIP– Do a file integrity check, the checksum is in sha512 and is located in the version.yaml file located just underneath where you downloaded the iso.
sha512sum ~/Downloads/harvester-vx.x.x-amd64.isoInstallation Steps
- Load it onto a usb drive and boot the hardware where you will load into the options to either:
- Create a new Harvester Cluster
- Join an existing Harvester Cluster
- Install Harvester Binaries Only
As this is our first node we will use option one, and "Create a new Harvester Cluster", this will install the base operating system and create the RKE2 cluster with Harvester installed on it. For reference: Option 2 is for adding a node to the cluster and Option 3 is for advanced installations where configurations may be loaded later.
- Select the correct disks for your setup
- Installation disk
- Data disk
- Persistent size
Harvester keeps separate partitions and/or disks for its VM storage and its OS storage. This is part of security best practices, but does require you to either:
- Utilize separate OS (Installation) and VM storage (Data) disks
- Utilize the same disk but set a partition size for the Operating System of not less than 150GiB
For best results utilize separate disks.
- Configure networking where we will have options for:
- Management NIC
- VLAN ID (optional)
- Bond Mode
- IPv4 Method
Enter your appropriate settings for where you want this placed, also note that there will be warnings if your NIC's are not at least 10Gbps, but this can be safely ignored if you are running a small environment or home lab. It is recommended to utilize a static IP setting for this configuration.
Side Note
This is just the management interface. If you only have two NICs it is typically best to use a LAGG for redundancy, but if you have more NICs for physical network isolation this is set inside of the Hypervisor UI and not in the initial setup.
- Set a hostname, it is recommended to a FQDN if you intend to enroll this device into any IDM solution.
- Enter your preferred DNS servers.
- Enter the VIP configuration or Virtual IP address. This is the address for the Harvester web server to do your management. It is also the address for admin level login if you lose connection from your Rancher control plane in the future. Set this to a static IP to be absolutely certain it doesn't change when you need it most.
- Enter a "Cluster token" think of this token as the password for interacting with your cluster, make it as secure as you can tolerate to type, and keep it in a very safe encrypted password manager.
- Add a password for a root privileged user. This user will be called "rancher" when utilizing ssh or the terminal console.
- Add your NTP Servers or use the defaults
- Add any Proxy addresses if applicable
- Import ssh keys from an http server if applicable
- Set the location of a remote harvester configuration file. This is helpful in large configurations, but in small setups like shown today is superfluous.
- Hit Yes to install with the settings
Installing Harvester - (Secondary Nodes)
Harvester is based on Kubernetes, so installing additional servers and adding them to your cluster is adding a worker or a worker/control plane node. This is important to remember as you design the infrastructure because unlike other hypervisor designs, not every node is always running the same software at the same time. Every node can be run like that, but as you'll see in the Rancher/RKE2 manual configuration later, there is a difference between the Control/Primary node software and just a worker node software.
To install this secondary node, perform the following:
- Boot the OS with the exact same Harvester ISO media as you created before
- After boot at the "Choose installation mode" screen, select "Join an existing Harvester cluster"
- Select "Default Role (Management or Worker)" to ensure that both roles are loaded to the OS
- Select an Installation Disk (OS) and a Data disk (VM Storage)
- Set your Management NIC(s), VLAN, Bond Mode, and IPv4 Method/Address. Ensure that this network has access to the other nodes you plan to use, or installation will fail.
- Set the hostname
- Set the DNS Servers
- Set the Management Address: This is the IP address/domain name of your control node we setup in the prior section. The setup will run a test on the server by curling https://$IP:443/ping and expect a "pong" response back
- Enter the cluster token you set in the previous section. This is effectively the password for your cluster.
- Set a strong password for your "rancher" user on this node
- Set the NTP Servers
- Set Proxy address if applicable
- Import SSH Keys from an HTTP server is applicable
- Import Harvester configuration file over HTTP. This is often for more advanced setups, and can be skipped on an initial setup
- Hit "Yes" to perform the install
This same process will be followed for any additional nodes, for as many nodes as you would like. (Current supported nodes per cluster is 5,000)
Harvester - Navigating the Basics
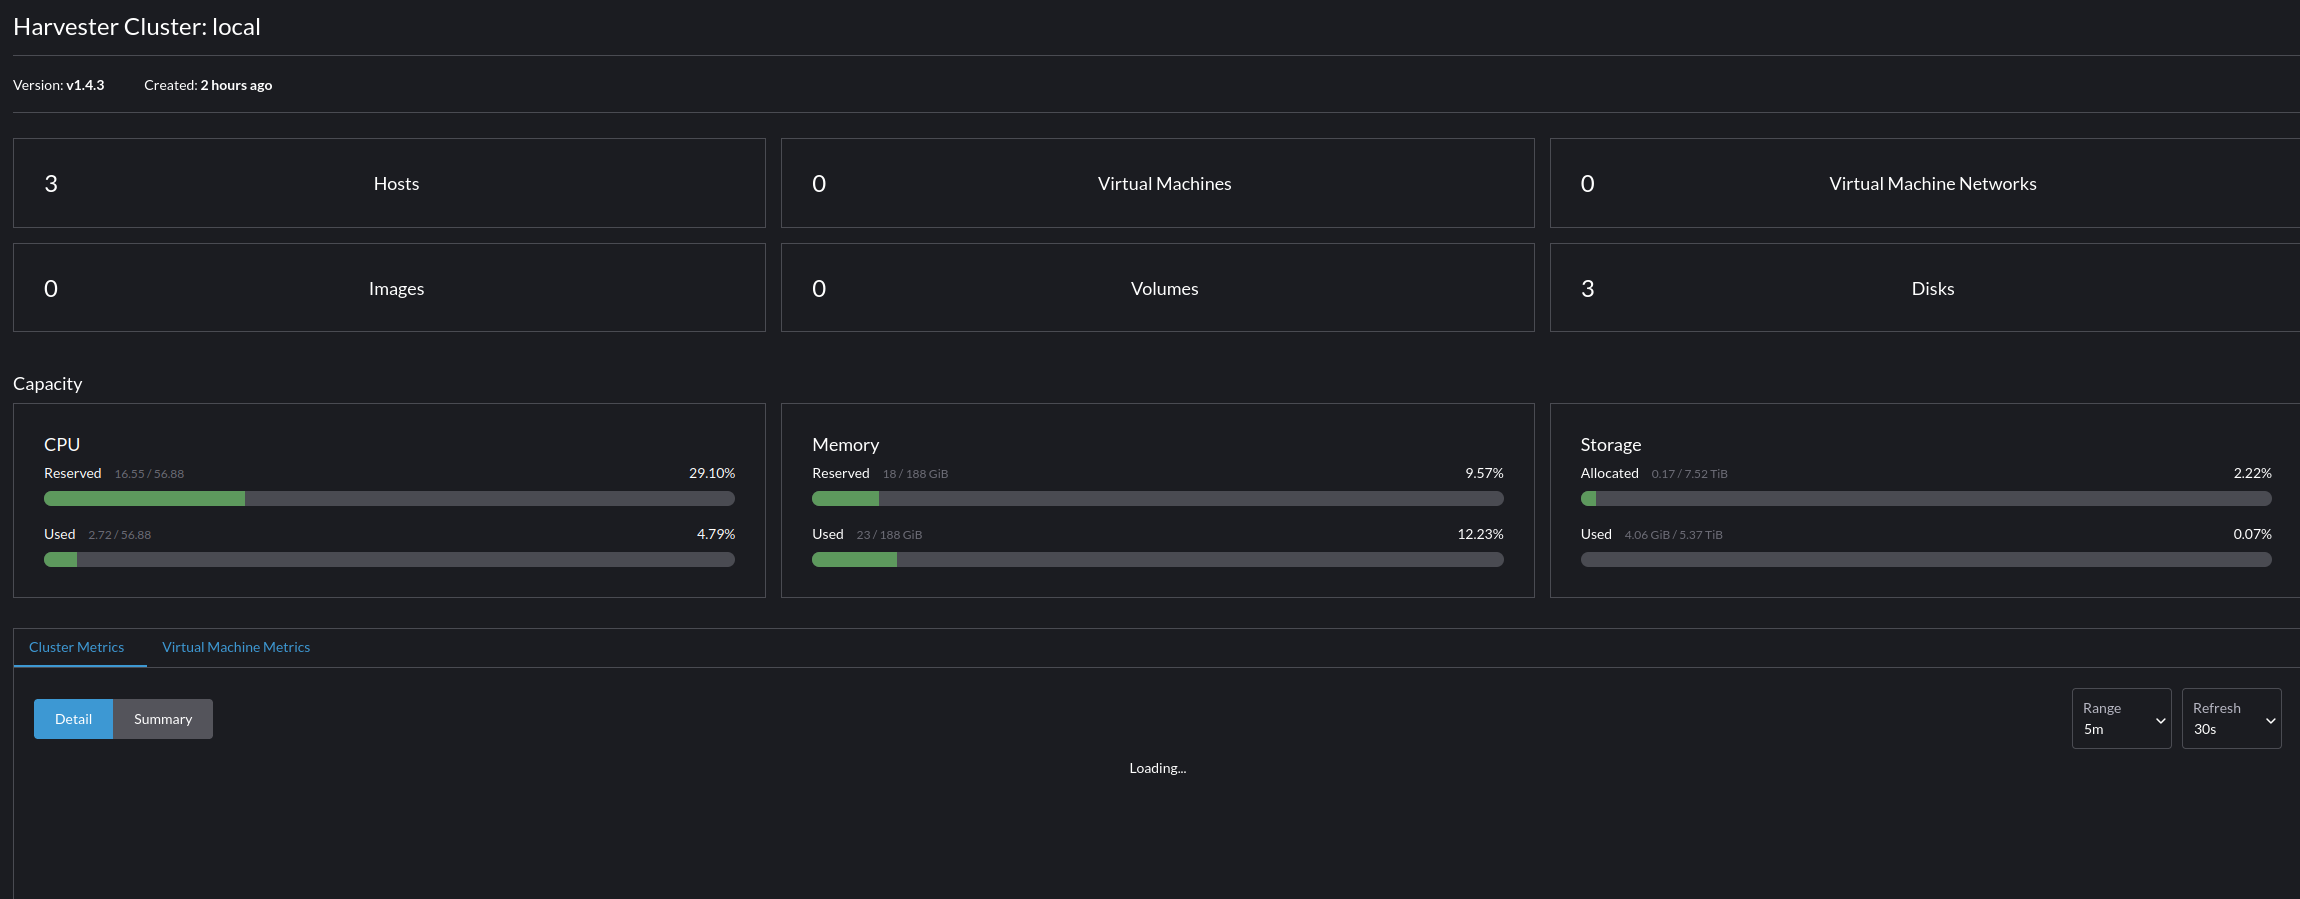
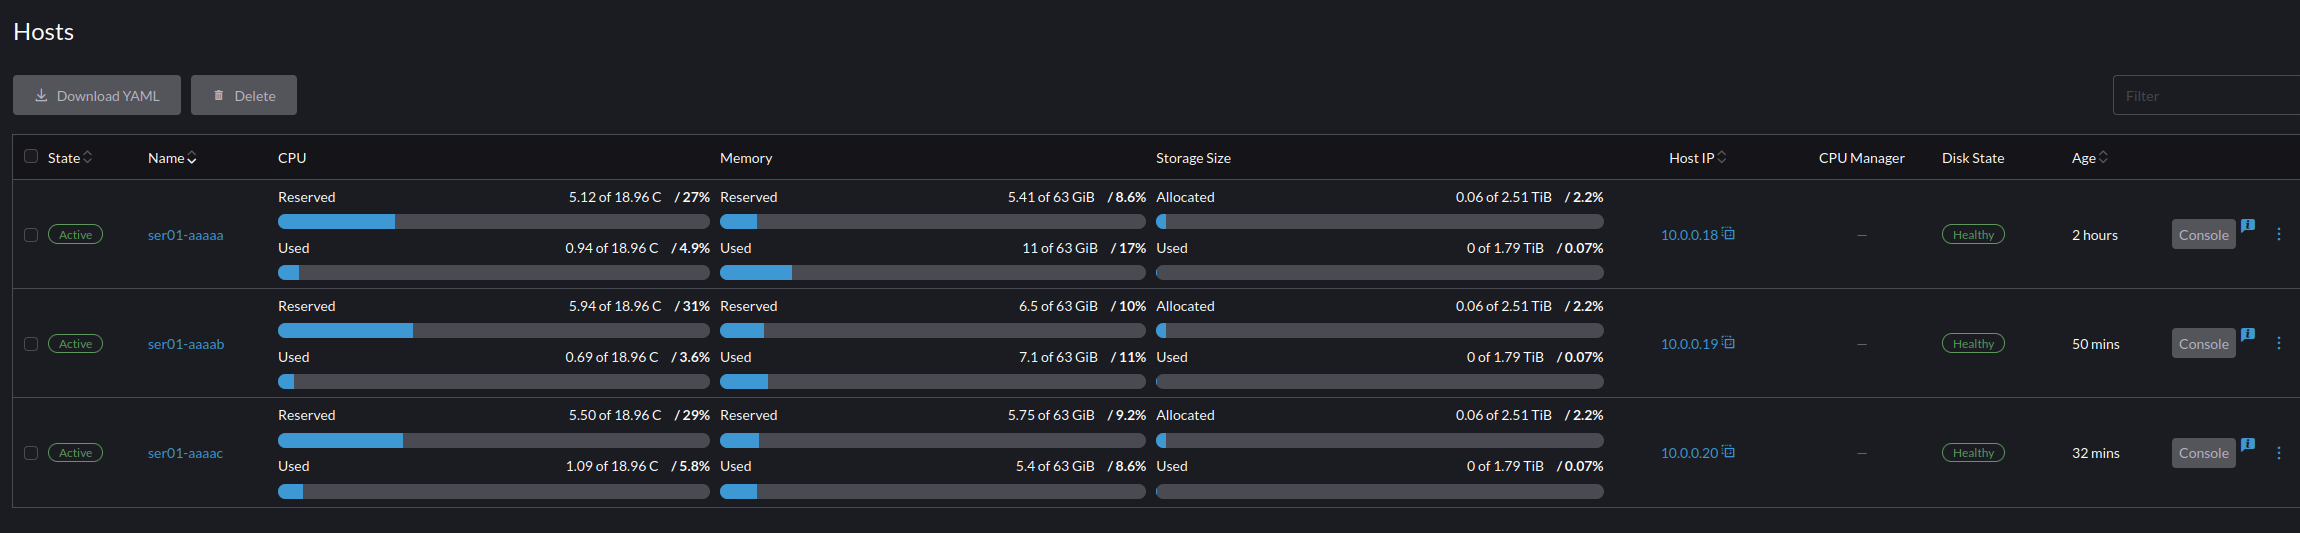
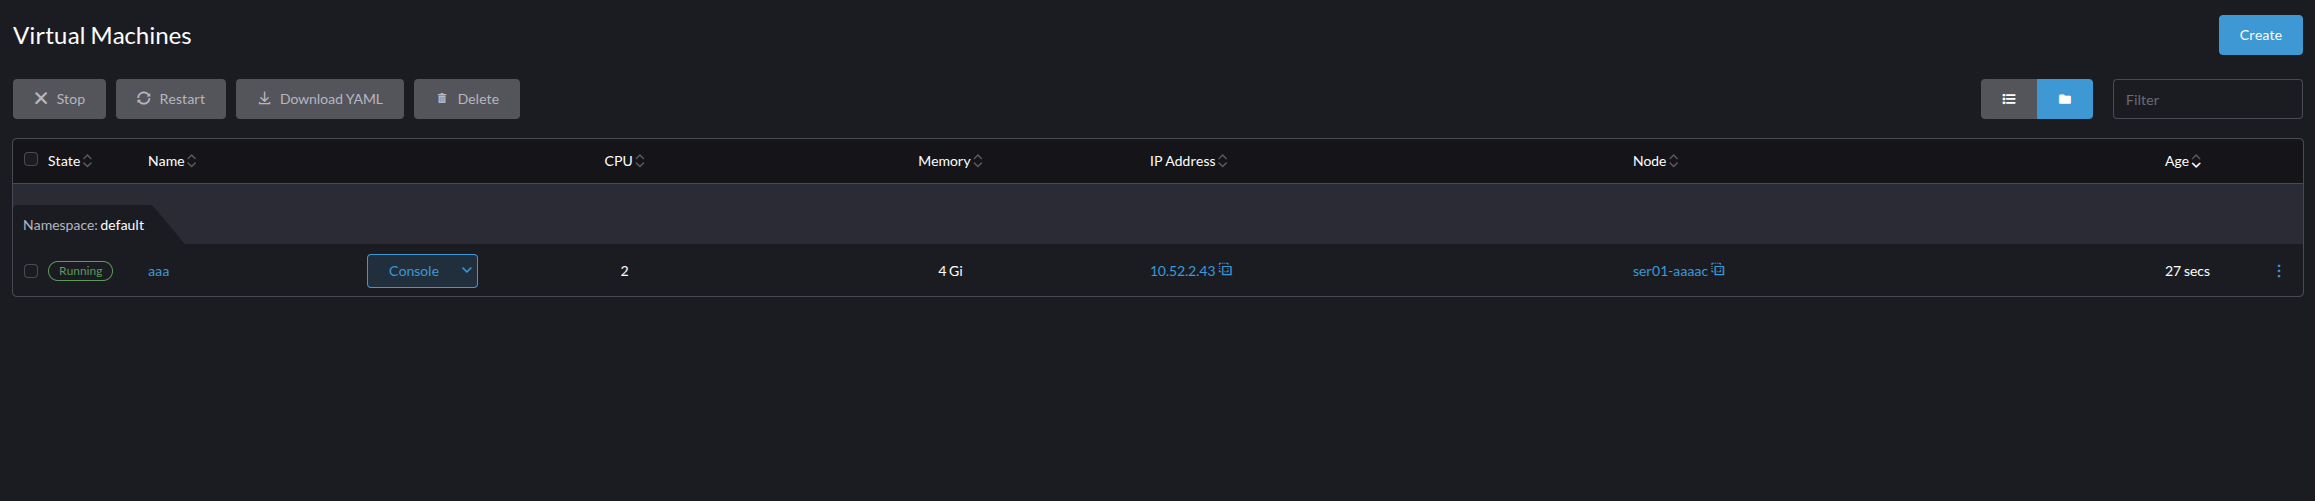
The following section will have screen shots from a live lab environment running Harvester 1.4.3, elements may change over time.
Rancher has 10 basic sections in the UI:
- Dashboard
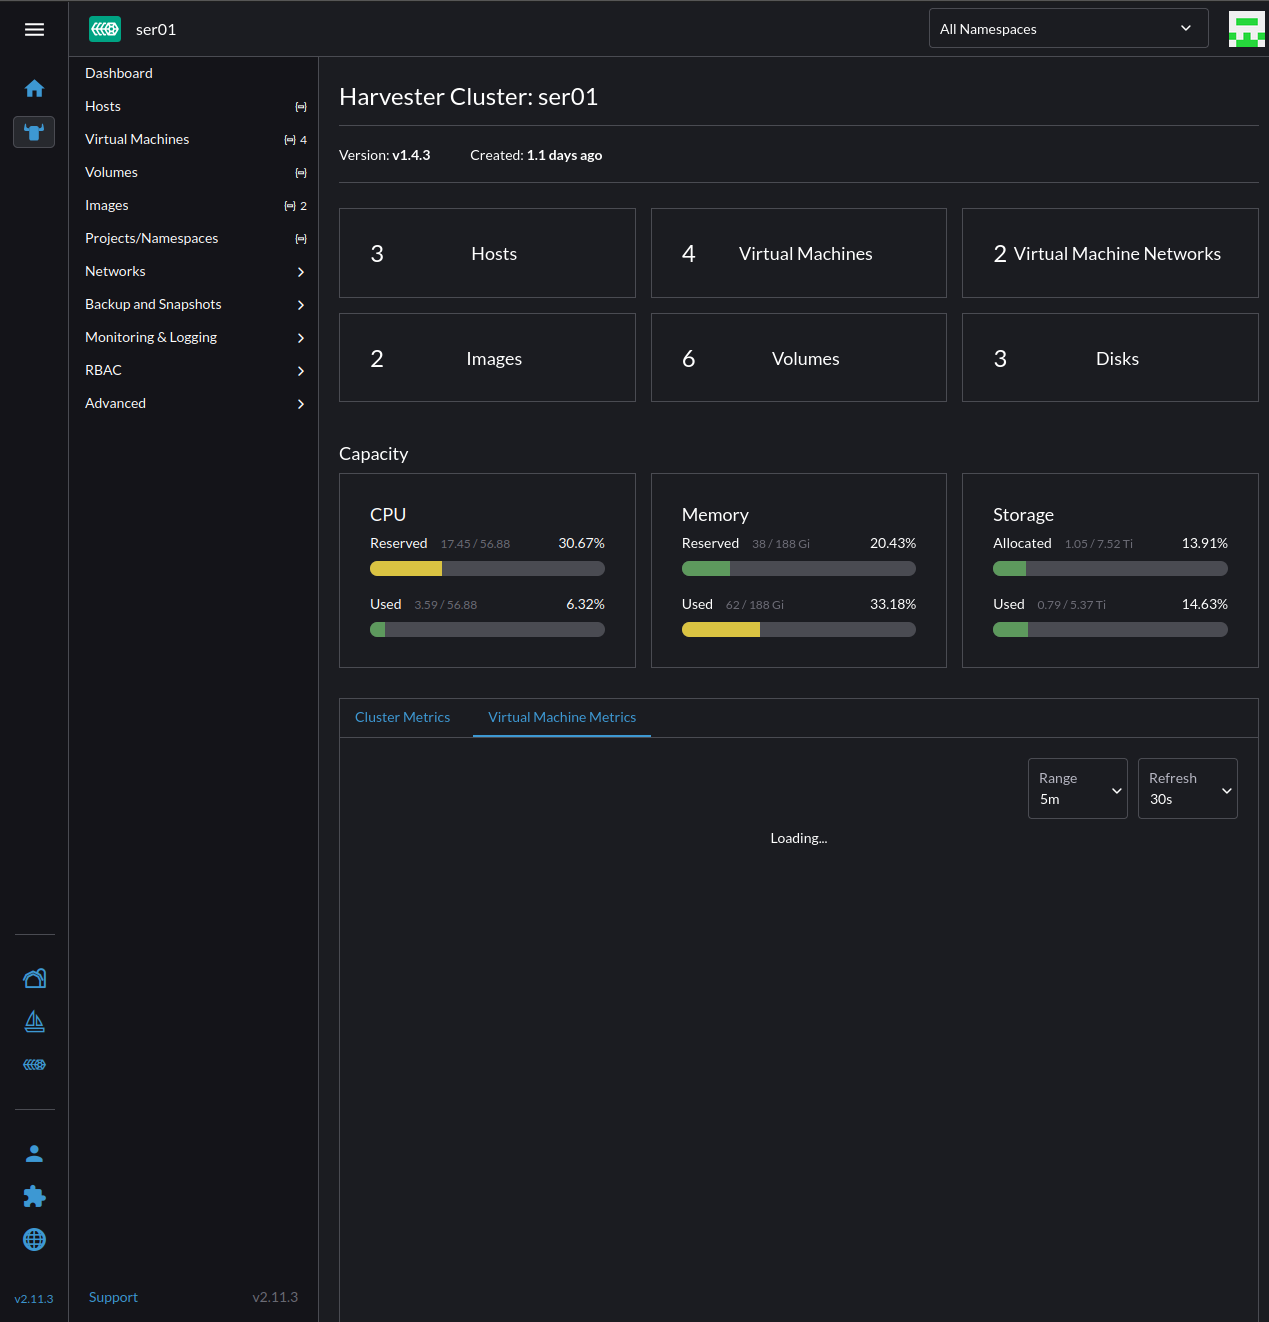
Analysis and overview of system information, including cluster hosts, VMs, networks, images, volumes, disks, and storage.
- Hosts
Hosts are the "Nodes" in your cluster, you can go here to alter specific configuration attributes for the node, and with the right configuration even modify out of band management parameters.
- Virtual Machines
Virtual Machines is for reviewing your virtual machines. From this panel you can enter into each VM with a serial connection, a VGA connection, or perform configuration updates/changes to the VM.
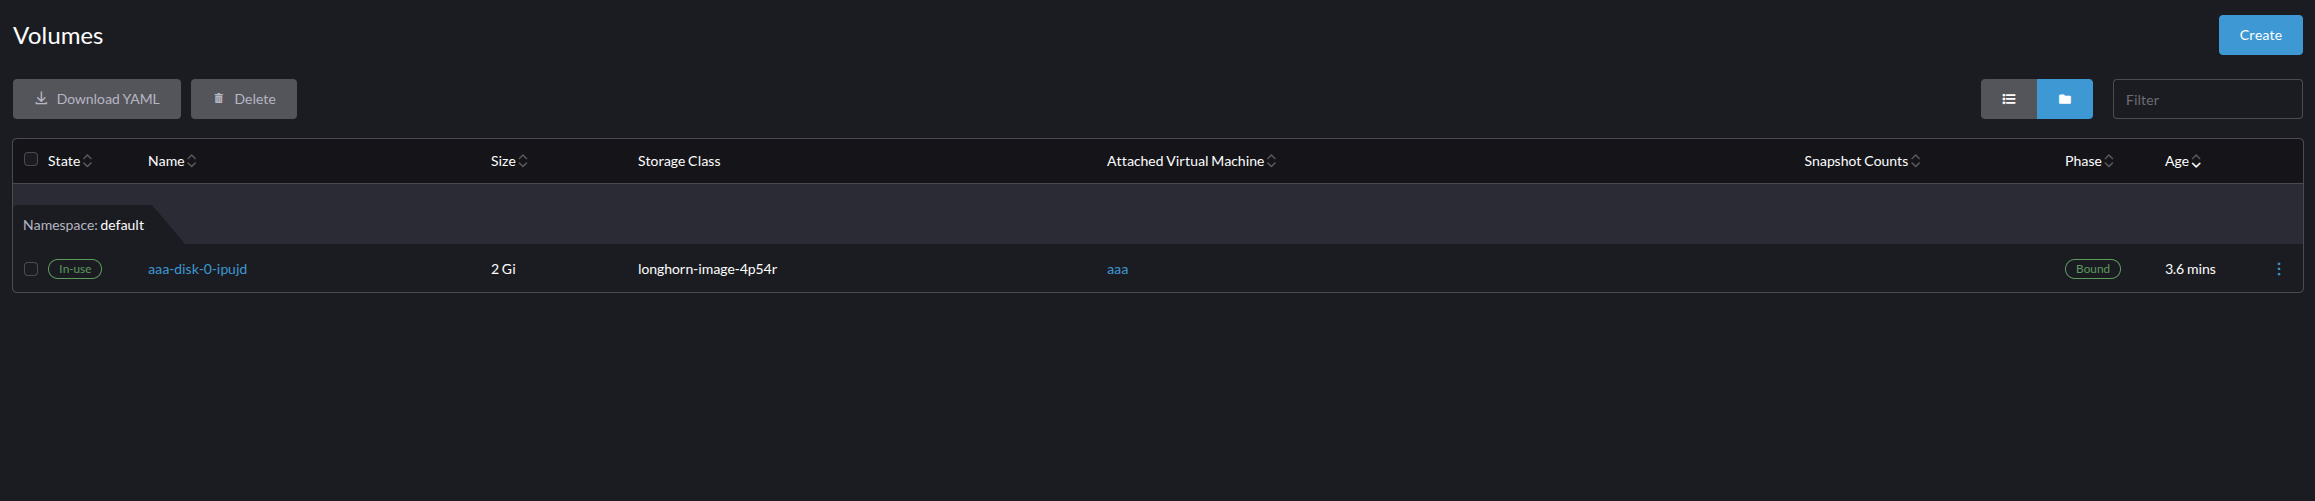
- Volumes
Volumes are all forms of volumes mountable in Harvester. This can be disks that have been attached to a VM, VM volumes, and snapshot volumes. Importantly Volumes are distinct from the Images we cover next, and the names on the volume panels are not always the same as what is seen from the VM side. This is to prevent any name space collision created from making everything a Kubernetes object for the hypervisor.
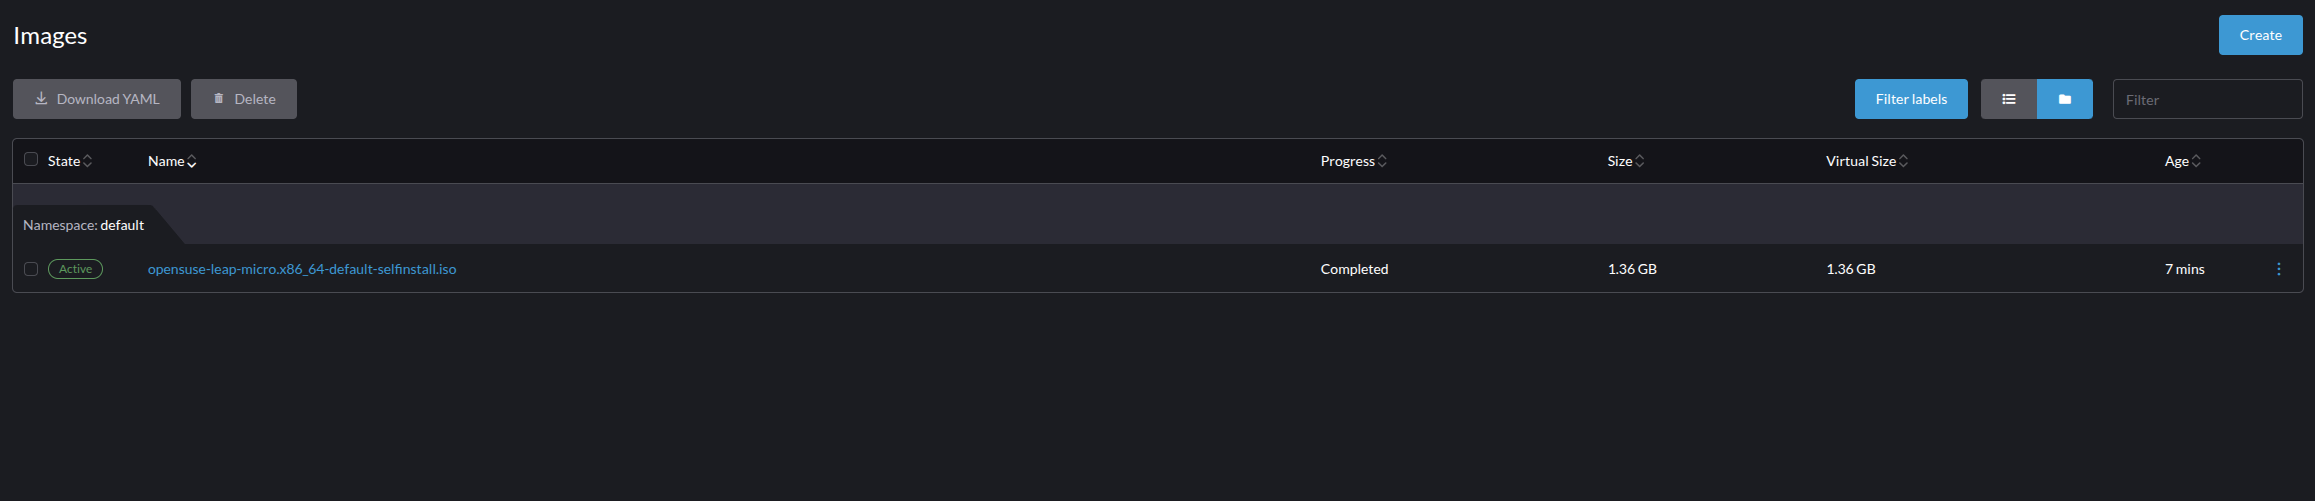
- Images
Images are disks, ISOs, containers, or other mountable, but not modifiable data types. These can be attached to VMs for boot or single usage, but importantly these are functionally imitable objects to the hypervisor.
- Namespaces
If you know Kubernetes, skip ahead. If you're new to Kubernetes or the Linux kernel in general, namespaces are isolated resource presentations for a process. This allows one process to be unaware of another process, and/or to see a different state of resources available to it. This is a foundational technology that makes Kubernetes and containerization possible, and in Harvester allows you to do specific resource separation on the management plane.
Since Harvester makes VMs and associate items into a Kubernetes resource if you separate objects into a "Dev" namespace and a "Prod" namespace you can separate resource access by users and teams, while also introducing a layer of resource separation down to the Kernel Namespace. This separation is an important improvement in resource isolation for group managed infrastructure, allowing you to institute highly granular control of VMs that is based on kernel level attributes instead of a higher level attributes of a control plane.
The default name spaces for Harvester are "default" and "harvester-public" - Networks
The most initially confusing screen for new users, the networks panel has four sections:- Cluster Network Configuration
This is for managing the mapping of Physical Interfaces into Virtual Interfaces. The default will always be a cluster network called "mgmt" which you setup during the installation. However, if you had other network types or additional NIC's you wanted to use for specific purposes you would set them up here first, so that you could then pass VLANs in through the next section - Virtual Machine Networks
Without a VLAN assigned you can only pass in the Cluster Network to a VM. In this page you can assign a VLAN to a Network Configuration, or create an un-tagged network. A strange difference for most users when adding these networks is the requirement for DHCP or adding the network information. This is a great feature (for me at least), that Harvester will track if an interface is up, and to do this it must have the network information or pull it from DHCP. - Load Balancers
Load Balancing on the hypervisor level is a game changer, especially for enterprise deployments that lack designated proxies for all use cases, and can't grant root level permissions for sub 1024 port forwarding. This feature allows you to create groups and forward and load balance data to other ports such as incoming port 80 to port 8080. This is an underutilized benefit of Harvester that I also rarely utilize despite its usefulness. - IP Pools
IP Pools are an essential part of Load Balancing. You need a space to pull addresses from for load balancing, and to manage their assignment back to a Virtual Machine Network. This is tracked inside of IP Pools and then pulled into the configuration for a Load Balancer.
- Cluster Network Configuration
- Backup and Snapshots
You can manage redundancy and/or backup of a VM and/or Volume with either a Backup or a Snapshot. Each can be scheduled or managed in one of the four identified sub-menus of:
-- Virtual Machine Schedules
-- Virtual Machine Backups
-- Virtual Machine Snapshots
-- Volume Snapshots
Backups and snapshots differ in several different ways but fundamentally for Harvester you'll need to understand.- Backups (VMs Only)
Duplicating the machine's data and state, and sending it to either an S3 bucket, or a NFS Server. - Snapshots (VMs and Volumes)
Taking a low level "picture" of the VM that you can restore to from another point. Functionally a light weight backup, that is far more susceptible to things going wrong, but convenient for being small and easier to trigger rollbacks with.
- Backups (VMs Only)
- Monitoring and Logging
Harvester allows the configuration of Alerts and advanced logging of the cluster's state and events. These are broadly configured here, with advanced features such as output through Prometheus and Grafana managed in advanced settings. I won't go into further details here, as this setup is highly customized to each enterprise and the logging solutions/reporting standards they have to meet. - Advanced
Advanced is Harvester's catch all for a broad set of "settings", if you cant find what you're looking for you'll typically find it here.- Templates
Harvester facilitates the creation of templates for VM creation. This is especially helpful with Harvester's usage of cloud-init to do initial configurations. Do yourself a favor and utilize this awesome feature to reduce setup times, especially in environments where you are restricted to specific OS versions and/or have specific implementations for compliance. - SSH Keys
Since Harvester utilizes cloud-init, it also allows you to inject and manage ssh keys. Store them here for ease of management. - Cloud Configuration Templates
Cloud configuration templates can be used with cloud-init to fill user data and/or network data. Set your default templates here. - Storage Classes
You can create customized storage classes for additional disks, and setup several critical features such as disk encryption, and replica management. This is a critical feature point for those who require secondary encryption at rest and/or advanced disk configurations. - SR-IOV Network Devices
SR-IOV allows devices to be presented as many devices to a VM, similar to how we assign VLANs in networking to logically separate a device into many devices. We can do the same thing here to present a NIC as many NICs to many VMs. - PCI Devices
Use this page to manage passing through of PCI/PCIe devices to specific VMs. Note that doing so restricts that device to only that VM and is no longer available to the system. - SR-IOV GPU Devices
Enabling and managing SR-IOV for GPUs is done on this page, and works roughly the same as networking devices. Note that at this time only Nvidia is supported. - vGPU Devices
After you've enabled a SR-IOV GPU Device you will need to make Virtual GPU's and assign it to a VM. You will configure these parameters here. - USB Devices
USB Devices can also be passed through to a VM utilizing this page. Note that doing so will make the USB port unavailable to the Host or other VMs. - Add-ons
Harvester has a few add-ons and we hope to see this number grow. You typically wont ever go here directly, but may get redirected to this page to enable specific add-on features such as the nvidia-driver-toolkit. - Secrets
Harvester is based on Kubernetes, meaning you also gain access to Kubernetes secrets. They are rarely used in VM's but are available here for management. - Settings
The top (or bottom?) settings page. We will use this page more extensively when we integrate with Rancher and a local CA, but for now note that nearly all other miscellaneous configurations will be done here.
- Templates
Rancher & RKE2
You survived the the hypervisor, now the real work begins... Kubernetes.
The flavor of Kubernetes we will be using is called RKE2 (Rancher Kubernetes Engine 2), some of you may already be familiar with a prior partner of this project called K3S, which is another SUSE supported project for simple Kubernetes. If you're ever in doubt between these two, I encourage you towards RKE2 as it is designed for more secure deployment environments such as FIPS/US Government applications.
For the base OS we will utilize SLE Micro 6.1/openSUSE Leap Micro 6.1, this is the LTS version of tools such as openSUSE MicroOS. If you do choose another base OS, ensure that it is not a rolling distribution, Kubernetes environments can have critical and completely breaking bugs from several dependencies and you need to be able to "roll-back" when these bugs occur (i.e. Don't use openSUSE MicroOS, I've already made that mistake for you).
In this example we will utilize VM's nested inside of our Harvester Cluster, but in production environments it is best to have separate hardware as nesting a control plane beneath a managed control surface creates opportunities for lockouts (Yes, I've locked myself out a time or two). To get started install 3 VMs with openSUSE Leap Micro with FDE, instructions on the installation are here. To ensure this works in Harvester make sure to enable the following on the "Advanced Options" page of the Machine Configuration:
- Enable TPM
- Booting in EFI Mode
- Secure Boot
Now with the OS(x3) Installed, lets work on the tools that we need for Rancher, we will need:
- RKE2
- Helm
RKE2 - Installation (Server/Control Plane Node)
To install the RKE2 Server Node utilize the following commands as root:
- Configure NetworkManager
NetworkManager manipulates routing tables for interfaces in the default namespace created veth pairs for container connections. To prevent this from interfering with normal operations add the following to the /etc/NetworkManager/conf.d/rke2-canal.conf file:
echo -e "[keyfile]\nunmanaged-devices=interface-name:flannel*;interface-name:cali*;interface-name:tunl*;interface-name:vxlan.calico;interface-name:vxlan-v6.calico;interface-name:wireguard.cali;interface-name:wg-v6.cali" | tee -a /etc/NetworkManager/conf.d/rke2-canal.con- Get and run the installer
Note that this only downloads a statically compiled binary, meaning that you will have to manage updates on your own. This is not typically an issue, but keep track of this in production environments using tools like UYUNI repos or other management configuration options.
curl -sfL https://get.rke2.io | sh -- Enable and Start the rk2-server service
systemctl enable --now rke2-server.service- Follow the logs to monitor the service startup
journalctl -u rke2-server -f- Copy the token for your Kubernetes cluster
cat /var/lib/rancher/rke2/server/node-token- Save your new system paths for the rke2 tools, and add them to the live session
echo 'export PATH=$PATH:/opt/rke2/bin' >> ~/.bashrc
echo 'export PATH=$PATH:/var/lib/rancher/rke2/bin' >> ~/.bashrc
echo 'export KUBECONFIG=/etc/rancher/rke2/rke2.yaml' >> ~/.bashrc
export PATH=$PATH:/opt/rke2/bin
export PATH=$PATH:/var/lib/rancher/rke2/bin
export KUBECONFIG=/etc/rancher/rke2/rke2.yaml
Helm - Installation
Helm is the Compose equivalent for Kubernetes, you can make yaml files and initialize them into running configurations just like other container environments such as Podman and Docker. Fortunately this is a single command install to get the install script and add the statically compile binary:
curl https://raw.githubusercontent.com/helm/helm/main/scripts/get-helm-3 | bashStable Endpoint DNS (HA - Only)
If you don't want HA then install your next two nodes as just worker nodes, otherwise we'll continue on making this RKE2 deployment Highly available.
As alluded to in the the start of the Harvester section, Kubernetes for true HA needs a stable endpoint, this can be achieved in many ways, but the easiest is Round-Robin DNS. To do this make a simple DNS record such as "rke2-cluster.net.domain.local" and add the three node's IP addresses as A records. This will create a simple round robin DNS to balance these out, just be aware this will be minimally functional, as in heavy production loads you'll want to use a context aware load balancer so forwarding stops to a node when it goes down.
Now that you have a stable entry point for the cluster, do one last modification to the primary node we just setup.
- Create the config file for the primary node
touch /etc/rancher/rke2/config.yaml- Create the necessary config file data to appear as follows
server: https://$STABLE_ENDPOINT:9345
token: $TOKEN
tls-san:
  - $SERVER2_FQDN
  - $SERVER3_FQDN
Additional Server/Control Plane Nodes
To install additional Server/Control Plane nodes for HA, install the base OS again on two additional Nodes and install RKE2 with the following, small modifications to above:
- Configure NetworkManager as before
echo -e "[keyfile]\nunmanaged-devices=interface-name:flannel*;interface-name:cali*;interface-name:tunl*;interface-name:vxlan.calico;interface-name:vxlan-v6.calico;interface-name:wireguard.cali;interface-name:wg-v6.cali" | tee -a /etc/NetworkManager/conf.d/rke2-canal.con- Get and run the installer
curl -sfL https://get.rke2.io | sh -- Create the config files
mkdir -p /etc/rancher/rke2/
touch /etc/rancher/rke2/config.yaml
Contents of the new file: Replace the servers with the two alternate servers fqdn.
server: https://$STABLE_ENDPOINT:9345
token: $TOKEN
tls-san:
  - $SERVER1_FQDN
- $SERVER3_FQDN- Install Helm
curl https://raw.githubusercontent.com/helm/helm/main/scripts/get-helm-3 | bash- Enable and Start the rk2-server service
systemctl enable --now rke2-server.service- Follow the logs to monitor the service startup
journalctl -u rke2-server -f- Save your new system paths for the rke2 tools, and them to the live session as well
echo 'export PATH=$PATH:/opt/rke2/bin' >> ~/.bashrc
echo 'export PATH=$PATH:/var/lib/rancher/rke2/bin' >> ~/.bashrc
echo 'export KUBECONFIG=/etc/rancher/rke2/rke2.yaml' >> ~/.bashrc
export PATH=$PATH:/opt/rke2/bin
export PATH=$PATH:/var/lib/rancher/rke2/bin
export KUBECONFIG=/etc/rancher/rke2/rke2.yaml
RKE2 - Installation (Worker Nodes)
Worker nodes will only need the RKE2 packages. Configure the OS as you did initially and then perform the following on two more machines to complete your RKE2 cluster as root.
- Get and run the installer
curl -sfL https://get.rke2.io | INSTALL_RKE2_TYPE="agent" sh -- Configure the rke2-agent service
mkdir -p /etc/rancher/rke2/
echo -e "server: https://$SERVER_NODE:9345 \ntoken: $TOKEN" | tee -a /etc/rancher/rke2/config.yaml
NOTE: If you used the HA stable endpoint described above you will need to instead use this /etc/rancher/rke2/config.yaml template to tell the worker node that the cluster is HA.
server: https://$STABLE_ENDPOINT:9345
token: $TOKEN
tls-san:
  - fqdn.server1
  - fqdn.server2
- fqdn.server3- Enable and start the rke2-agent service
systemctl enable --now rke2-agent.service- Follow the logs to monitor the service startup
journalctl -u rke2-server -f- Save your new system paths for the rke2 tools, and add them to the live session
echo 'export PATH=$PATH:/opt/rke2/bin' >> ~/.bashrc
echo 'export PATH=$PATH:/var/lib/rancher/rke2/bin' >> ~/.bashrc
export PATH=$PATH:/opt/rke2/bin
export PATH=$PATH:/var/lib/rancher/rke2/bin
Installing Rancher
For this installation we will be utilizing a more advanced, but also more common deployment case for enterprise applications, Rancher deployment with an external Certificate Authority. To do this please follow your internal processes to acquire an internal Key/Cert files before proceeding. Then as root perform the following on the Server Node:
- Add the helm chart repository for Rancher Stable
helm repo add rancher-stable https://releases.rancher.com/server-charts/stable- Create a namespace for Rancher to run in
kubectl create namespace cattle-system- Generate a Kubernetes tls-secret file.
Kubernetes has different types of secrets, one of those being for tls secrets. You will need specific file names and types to achieve this, the files must PEM-encoded and be named:
- tls.crt (TLS Certificate)
- tls.key (TLS Key)
- cacerts.pem (Root Certificate Authority For Cross Node Trust)
To generate the required Kubernetes secret files enter the directory where you files are stored and perform the following commands:
kubectl -n cattle-system create secret generic tls-ca \
  --from-file=cacerts.pem

kubectl -n cattle-system create secret tls tls-rancher-ingress \
  --cert=tls.crt \
--key=tls.key- Install Rancher with helm
helm install rancher rancher-stable/rancher \
  --namespace cattle-system \
  --set hostname=$RANCHER_HOSTNAME \
  --set bootstrapPassword=admin \
  --set ingress.tls.source=secret \
--set privateCA=true- Monitor the rollout
kubectl -n cattle-system rollout status deploy/rancher- Go to your defined url and you can now set a password and login to Rancher.
Rancher - The Survival Guide
Welcome to Kubernetes! Welcome to Rancher!
You've survived the infrastructure setup process, congratulations on not giving up! Now we have to use Rancher and understand Rancher enough to:
- Review the Basic Features of Rancher
- Integrate Rancher and Harvester
- Deploy a simple application to our Kubernetes cluster using Rancher
Rancher - Navigating the Basics
Rancher has more than a few functions built into it, and without an overview it is far too easy to skip past them. As the sub menus have additional sub menus we won't go to far in depth like as with Harvester, but it is still important to know the location of basic functionality with the Rancher UI.
- Home
The home screen is the starting location for you to review your clusters status. This becomes vital as you start to manage several clusters in different locations, and is also the starting point for locating your links to documentation, forums, and commercial support.
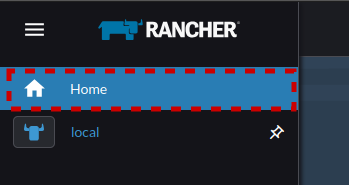
- Pinned Clusters
The default pinned cluster is "local" or the "local" cluster that you are running Rancher on. You can pin additional clusters below it in this panel, but think of these sub areas as shortcuts to you most commonly utilized clusters.

- Cluster Management
While accessing the clusters directly from "Home" or "Pinned Clusters" is for managing and deploying items to your cluster. Cluster Management is the place to go for configuration, management, and tracking. When you need to know details, troubleshoot the cluster configuration, or check conditions and provisioning you do it all in Cluster Management.
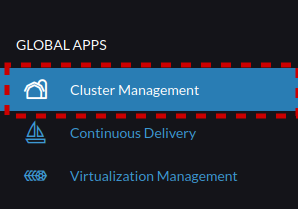
- Continuous Delivery
Continuous Delivery can be a bit more tricky to correctly integrate with Kubernetes vs traditional infrastructure. SUSE has made this a bit simpler to manage by integrating Fleet Continuous Delivery directly into Rancher. We won't delve deeper into this on this article, but stay tuned for more information on integrating Fleet for more advanced deployments.

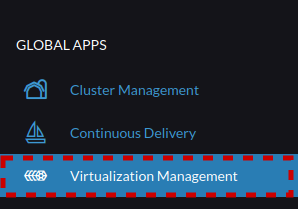
- Virtualization Management
This is the home for VMs managed with Harvester. For more details see the above section"Harvester - Navigating the Basics".
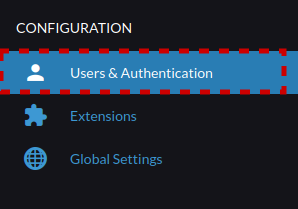
- Users & Authentication
Managing users and their permissions is vital in an enterprise setting. Fortunately Rancher supports multiple IDM solutions including FreeIPA, Microsoft AD/DC, Azure AD, Keycloak, Github, OpenLDAP, and others. These are all fairly easy to get running with group filtering and permissions, but you can also utilize local users, roles, and groups, for air gaped deployments or small environments.
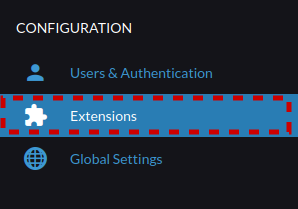
- Extensions
Rancher supports an extension library to complete integrations such as adding clusters on Nutanix and CloudCasa. You can add these extensions and others such as the Harvester UI extension from this panel.
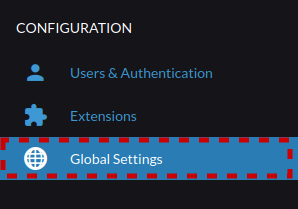
- Global Settings
Global settings operates similar to Harvester's Advanced -> Settings panel, containing all of the general configuration options and advanced user settings.
Integrating Rancher and Harvester
While Harvester does have a stand alone UI, this is mostly for backup (i.e. when you've locked yourself out of Rancher), and for basic configuration/usage. As soon as you want to do things like transparently manage your Kubernetes clusters, or have multi user integration, you need to utilize Rancher. Fortunately this is a relatively simple process:
- Ensure your Harvester servers are DNS aware of your Rancher servers. This process requires dns resolution from the Harvester server to the Rancher server.
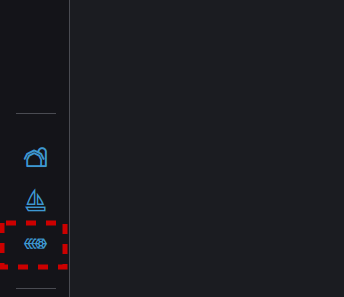
- On Rancher select the Virtualization Manager on the Lower left of the screen
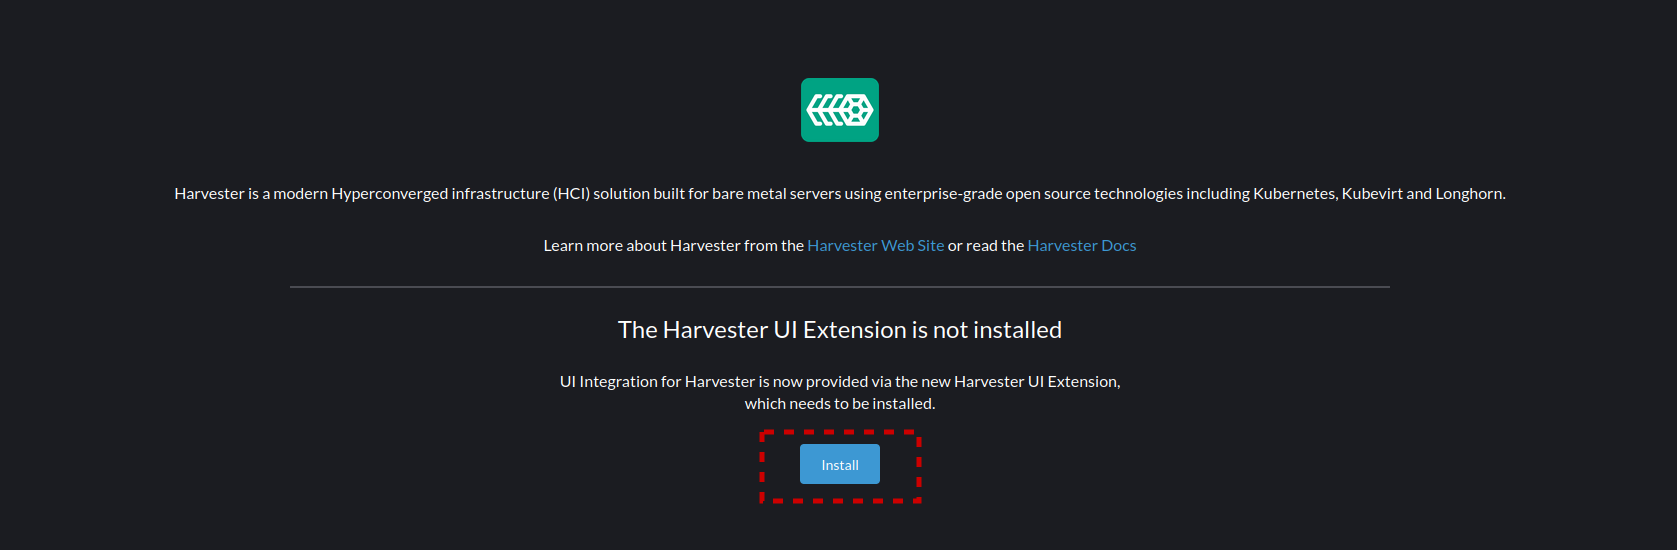
- The screen will display that the Harvester UI Extension is not yet installed. Select Install, this can sometimes take a few minutes to install, and sometimes also fails. If it fails the best course of action is to reload the page and hit install again.
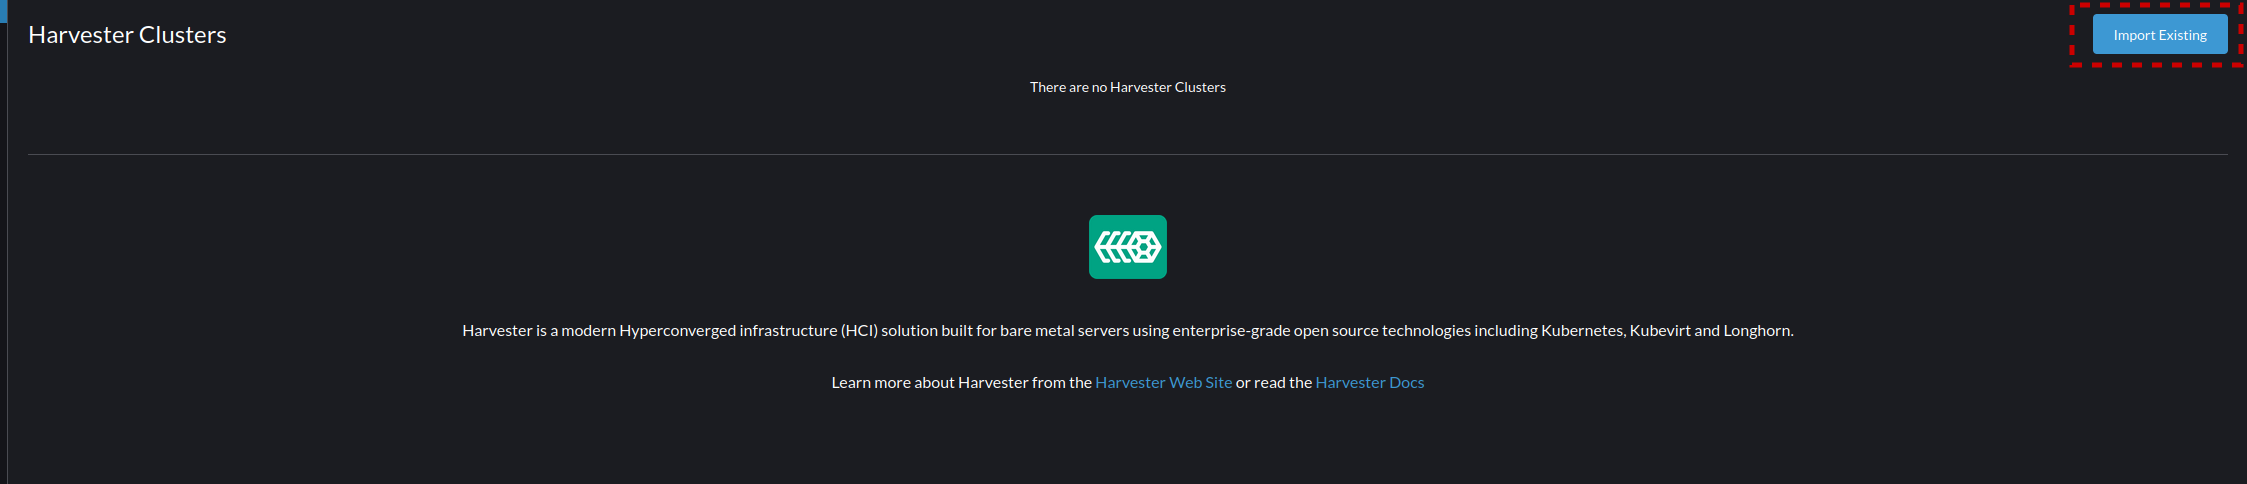
- After installation of the extension you will need to import your Harvester Cluster. To do this select "Import Existing in the upper right section of the screen.
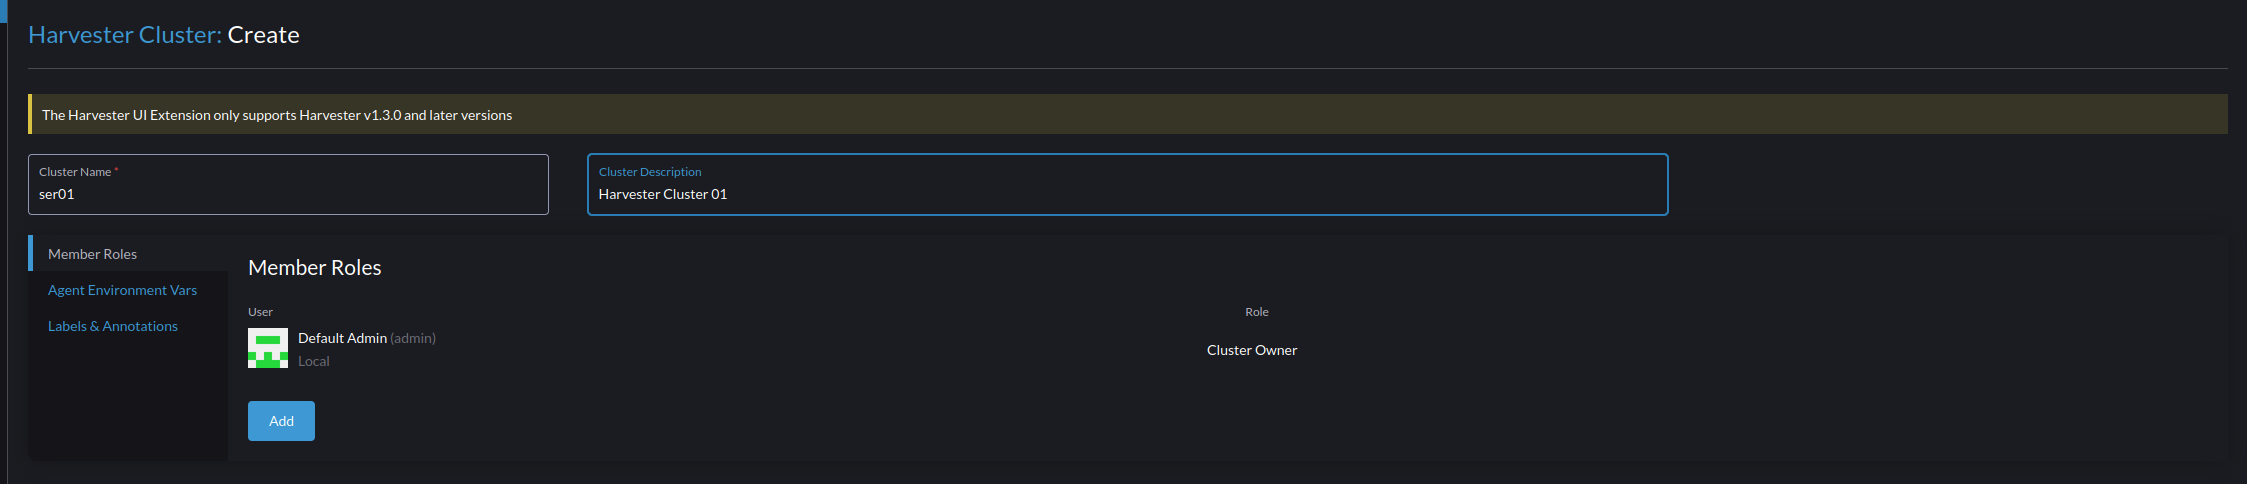
- Give your cluster a name and description. Make this name unique, as you can manage multiple VM clusters with this single Rancher interface.
- After applying, the screen will show a registration URL that will need to be entered on your Harvester cluster to join it to the Rancher installation.
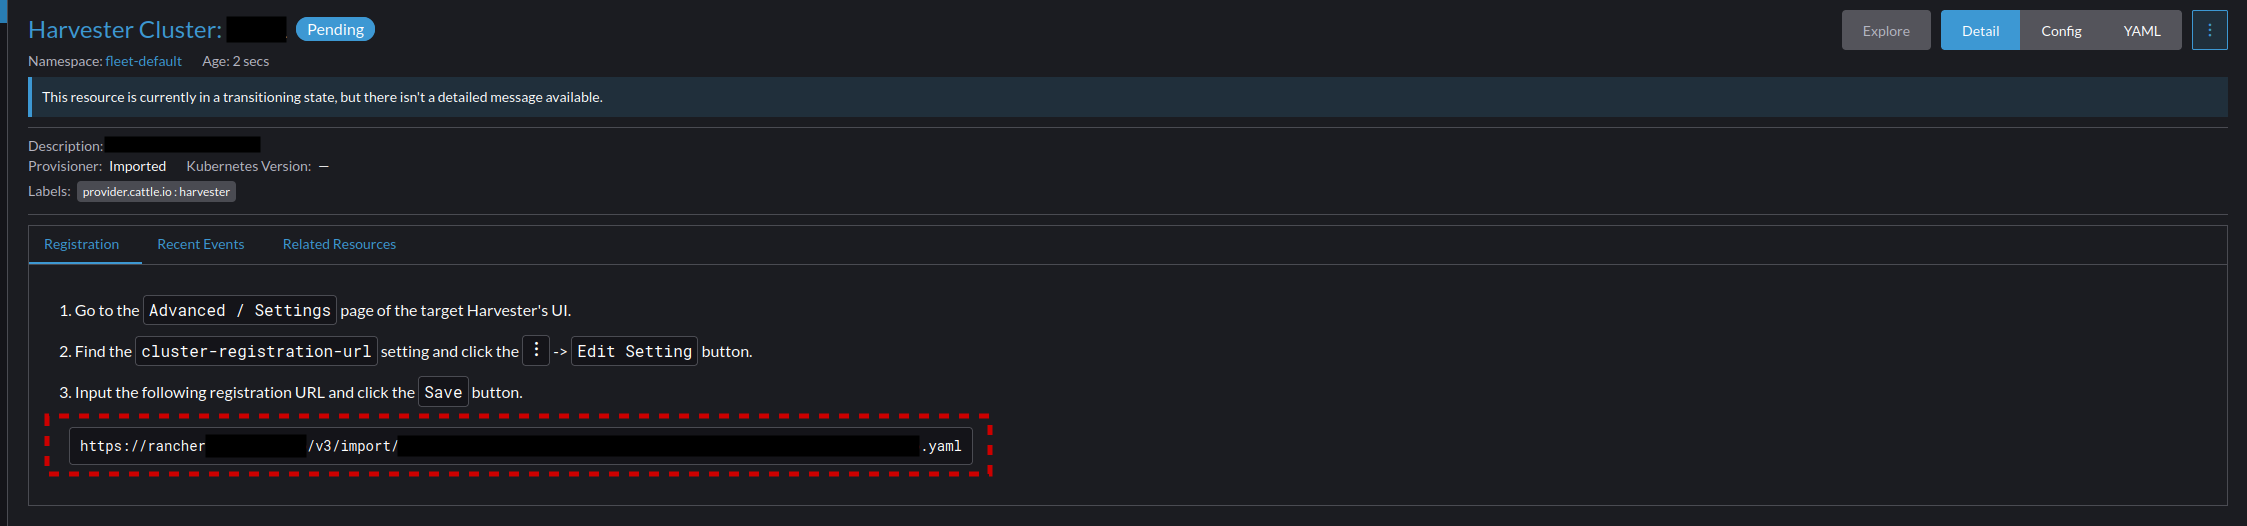
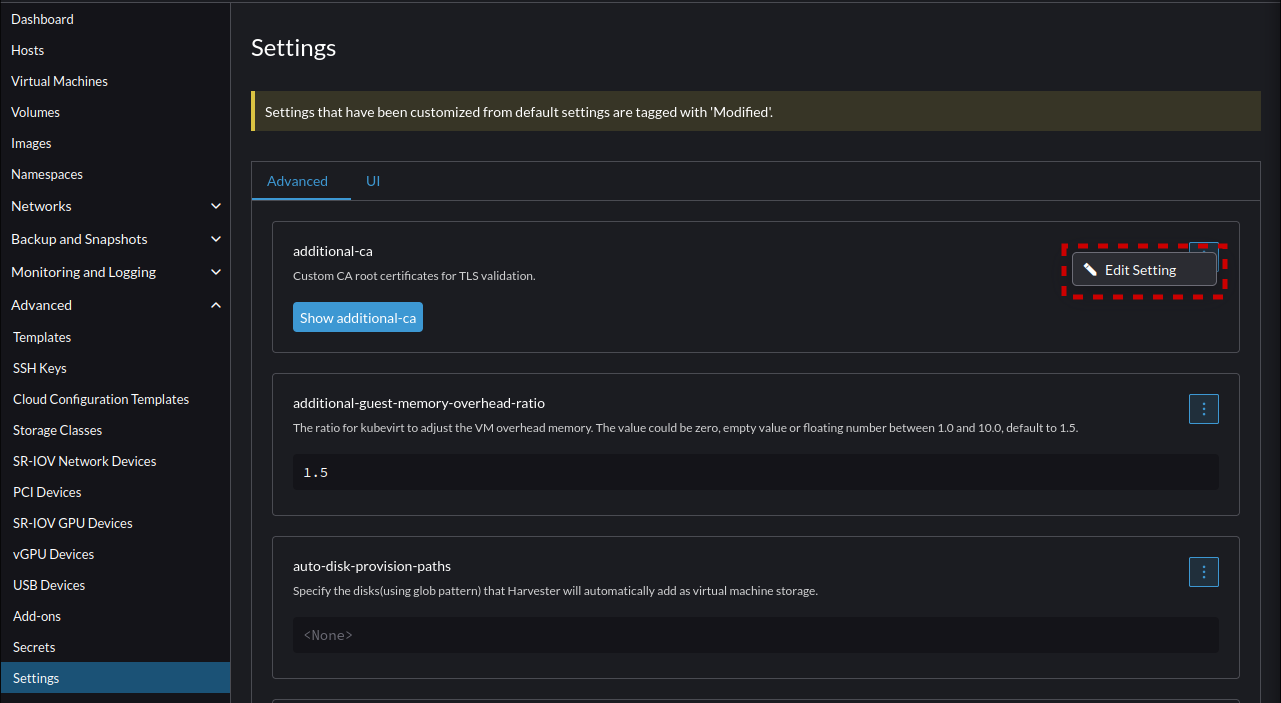
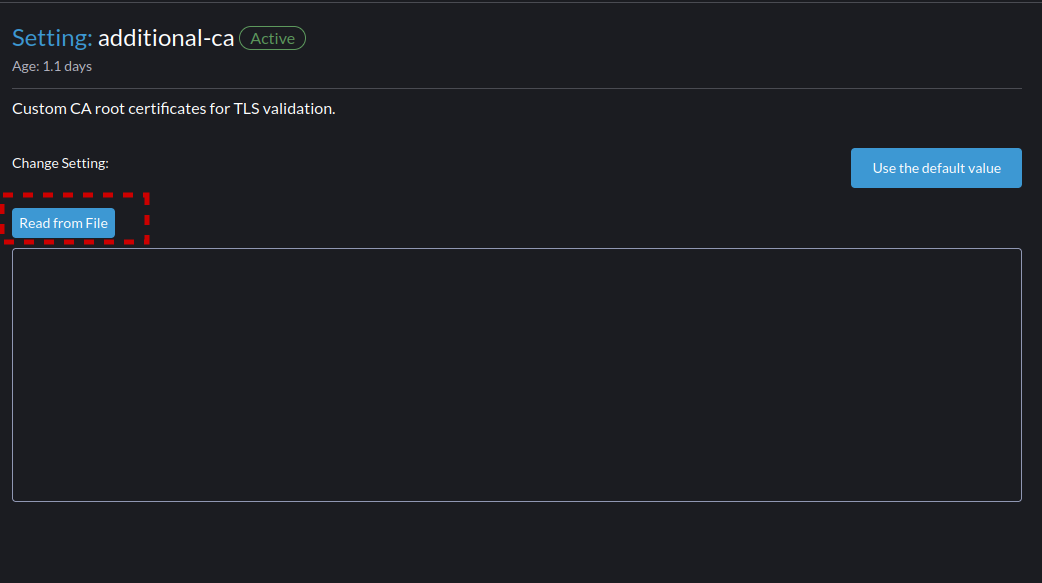
- Go into Harvester Under "Advanced --> Settings". And before we paste in the Rancher Registration URL we will need to add our CA to the Harvester Trust store so it can access the end point for registration. To do this select the top option's menu "additional-ca" and select "Edit Setting"
- Now select and upload your CA into Harvester so it will trust the Rancher web server.
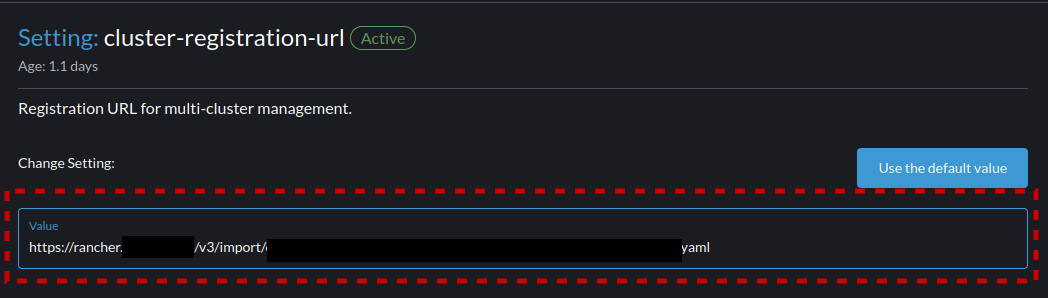
- Now back in the Advanced -> Settings menu. Scroll down and select "cluster-registration-url" and "Edit Setting"
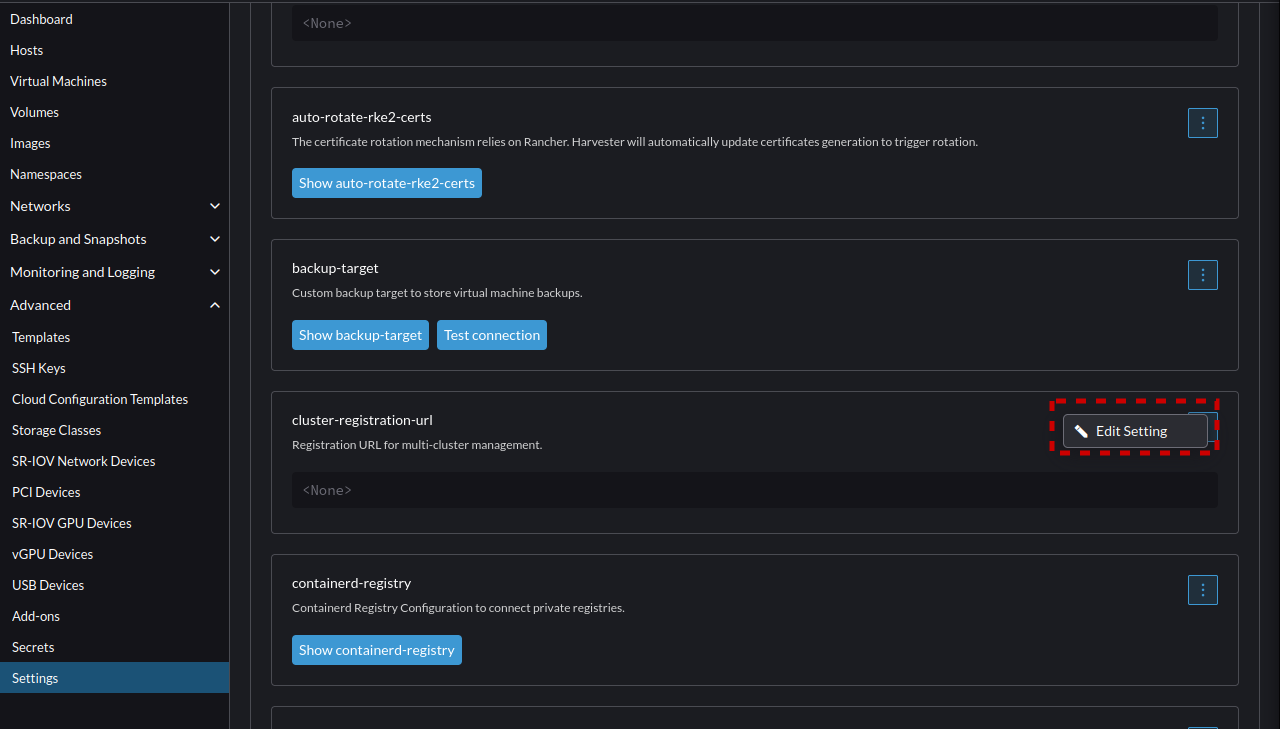
- Enter the URL received from the Rancher registration page earlier.
- Now monitor on the Rancher interface for Harvester to complete the communication to Rancher and show as "Active" when it does select the "Harvester Clusters" button to return to the view for the Clusters.

- Now you can select the Cluster's name to enter into the cluster where all UI elements remain the same as we covered in the section "Harvester - Navigating the Basics"
Rancher - Deploying Your Applications
Now that we've deployed Rancher and Harvester, its time for some hands on learning to deploy and manage our first project. To test this we will deploy a simple NextCloud container without persistent storage and a single pod.
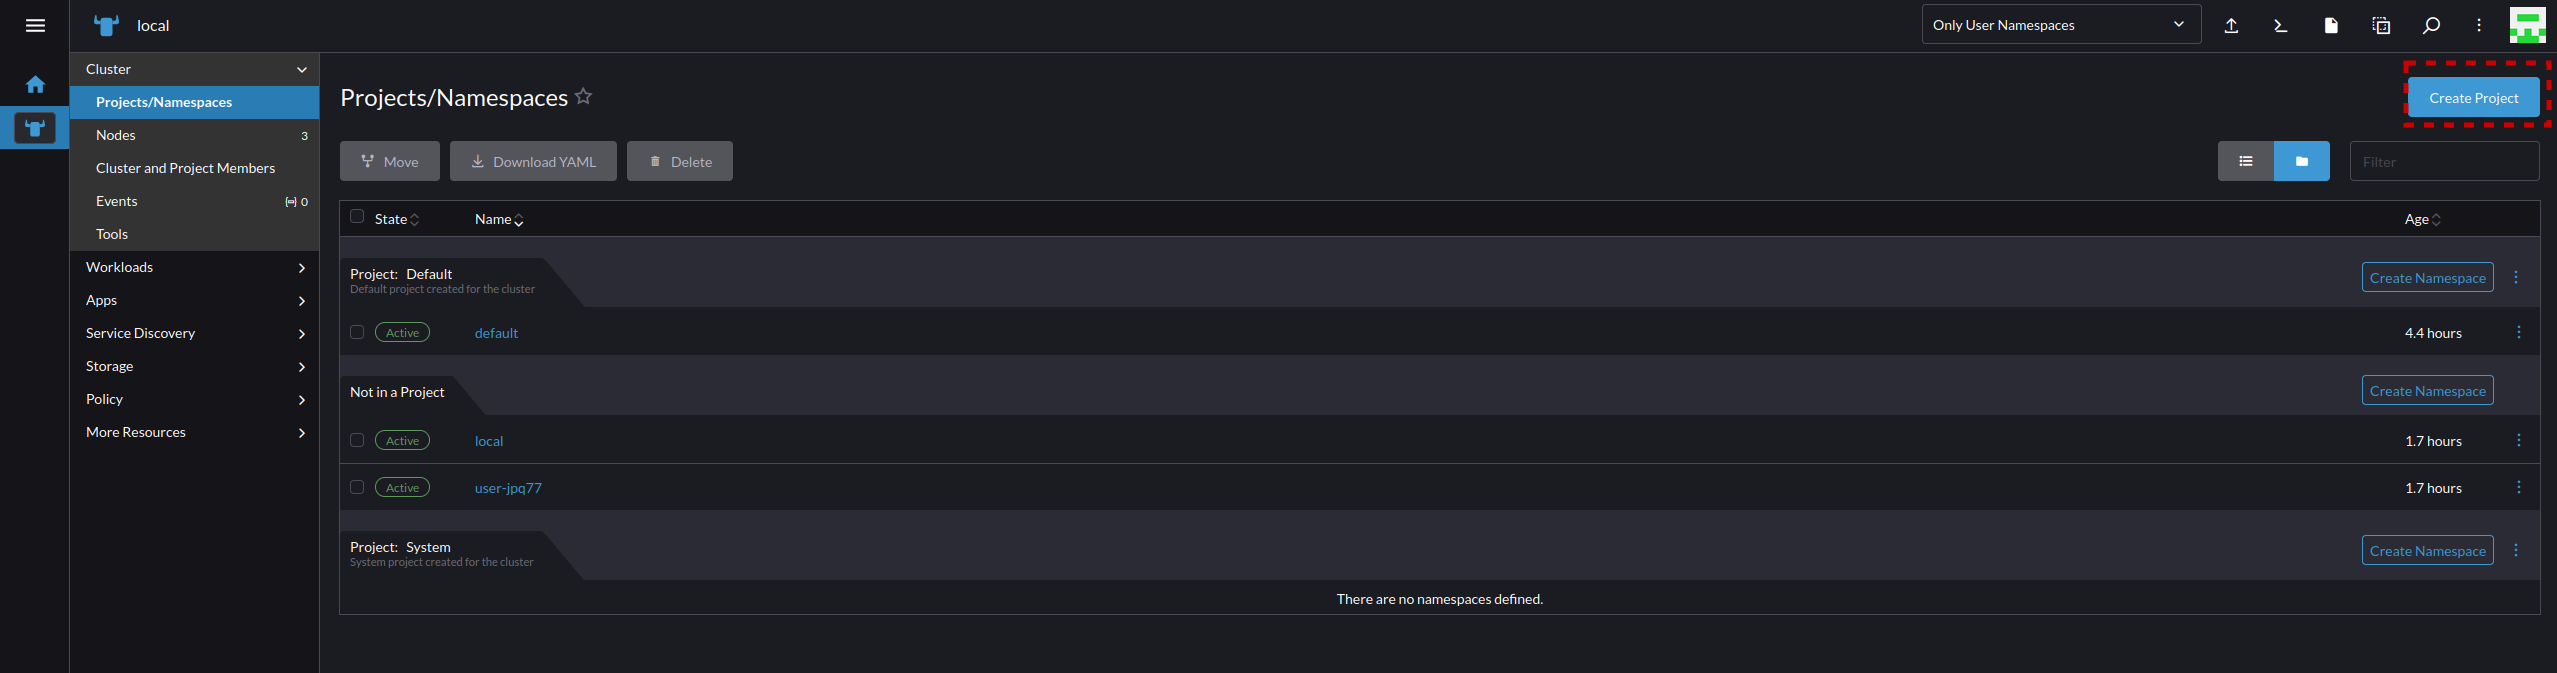
- Goin into the "local" cluster and navigate to "Projects/Namespaces"
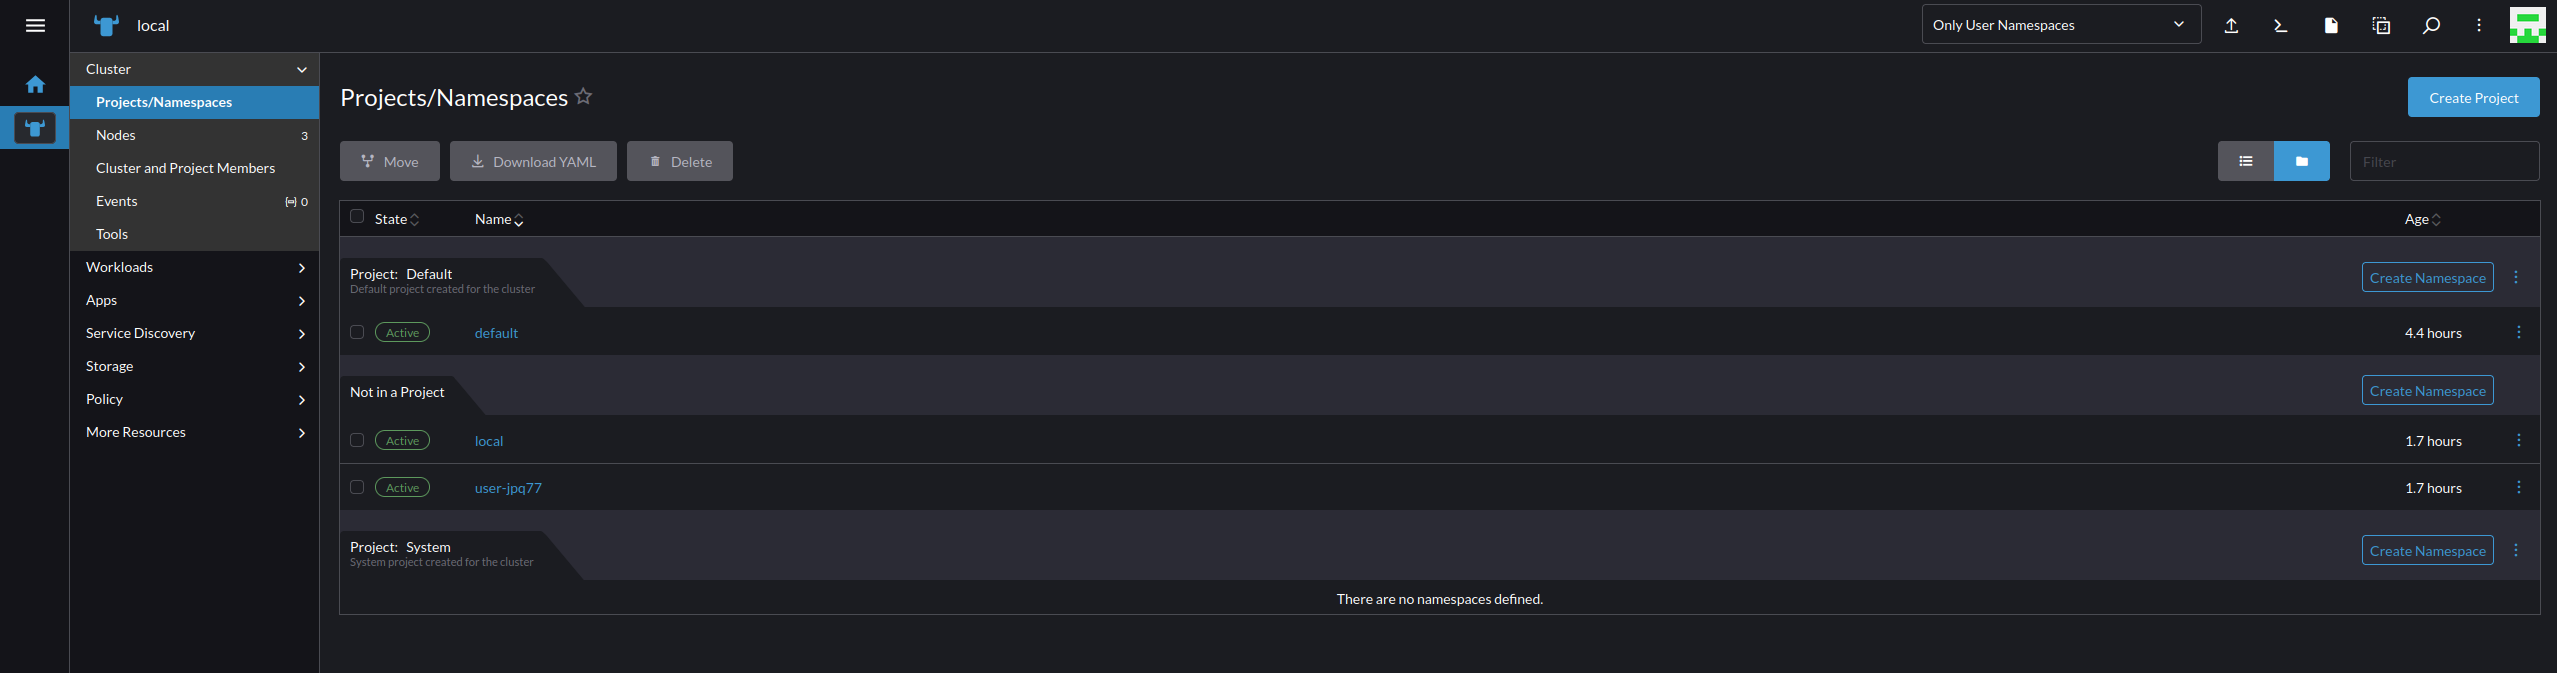
- Projects and Namespaces are different and can be managed on a many to one relationship. So there can be many namespaces in a project, but a project cannot be associated with namespaces from other projects. To get started today we will create a Project called "infrastructure" by selecting "Create Project" on the upper right of the screen.
- Now we can create a namespace in the "infrastructure" project called "nextcloud" by selecting "Create Namespace". Note that you don't always need this level of isolation of Projects and Namespaces, but we are covering these steps to make clear how to perform sufficient isolation as you scale.

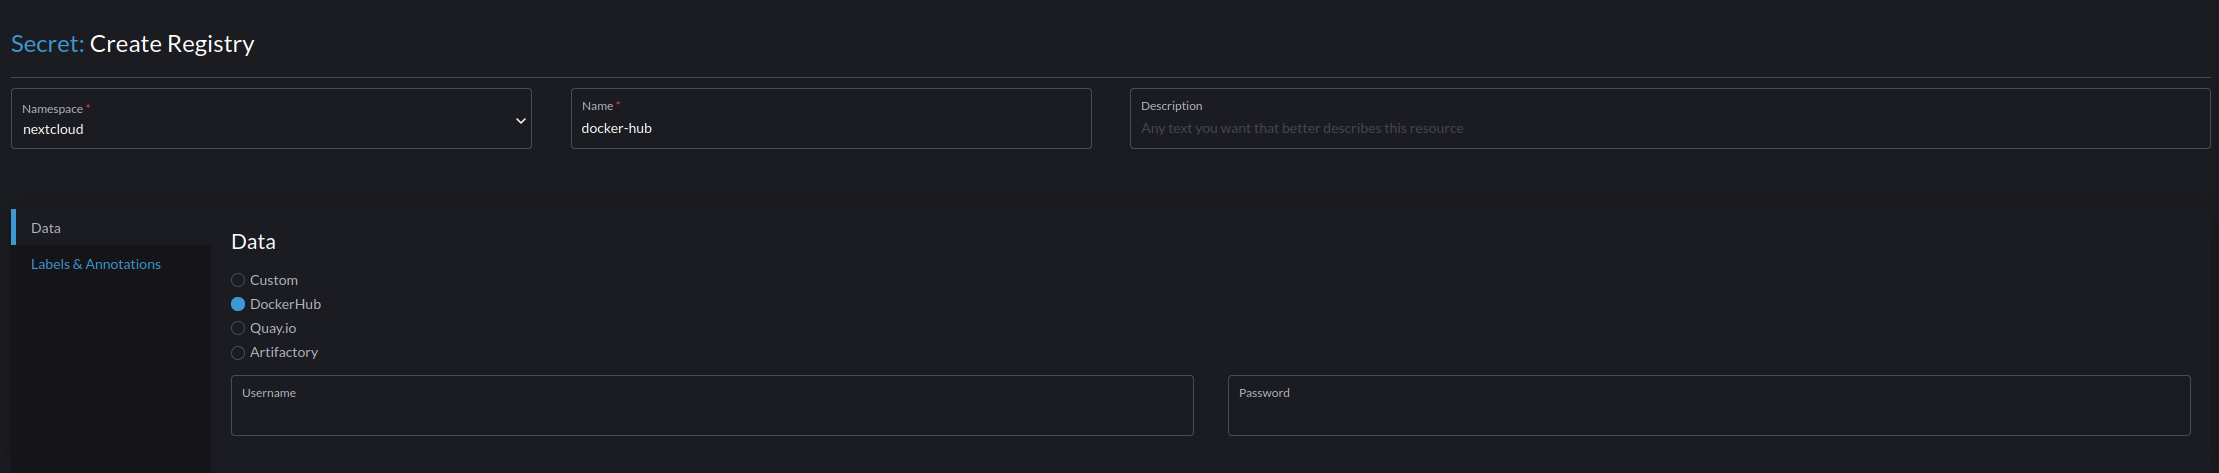
- Navigate to Storage -> Secrets, and select "Create". This is necessary for us to add docker hub as a pull secret so we can pull from Docker Hub. The process will be the same for adding other sources for containers.

- Select Registry
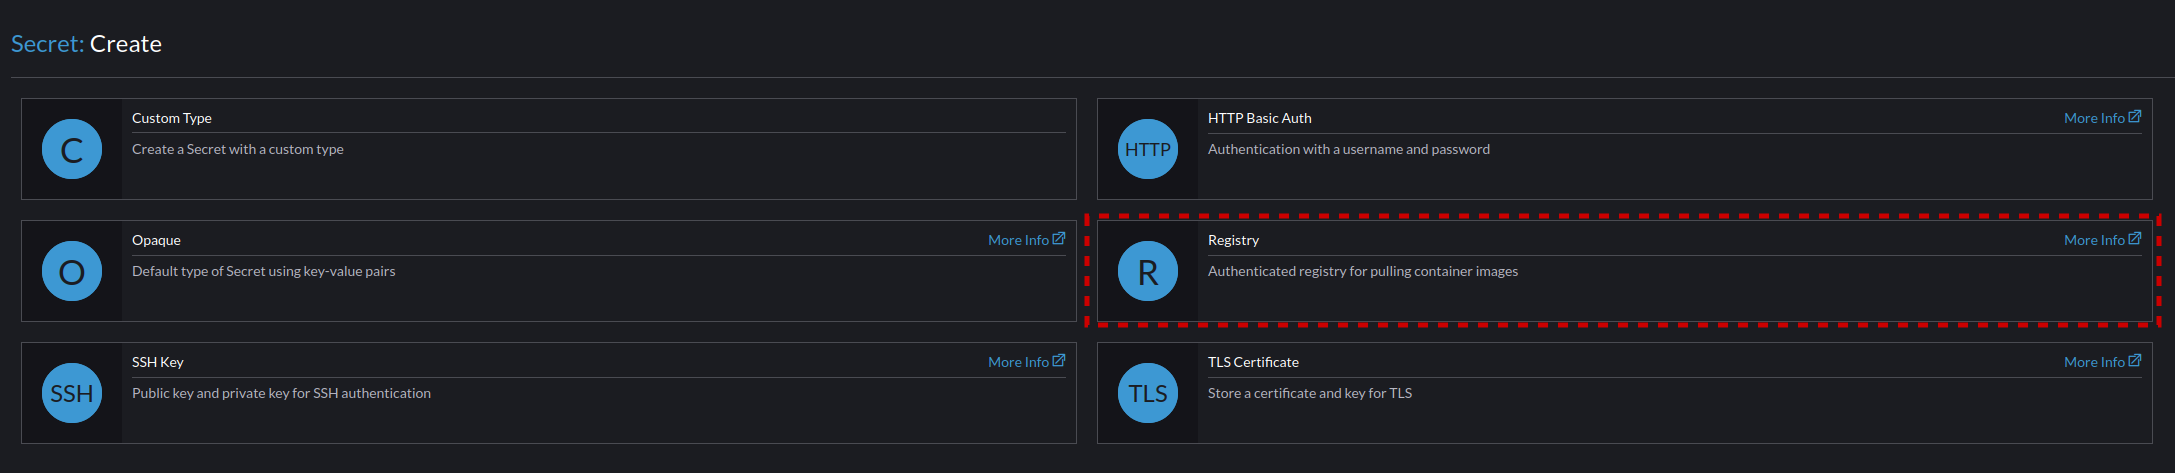
- Set the following settings for the registry:
- Namespace "nextcloud"
- Name "docker-hub"
- Data "DockerHub"
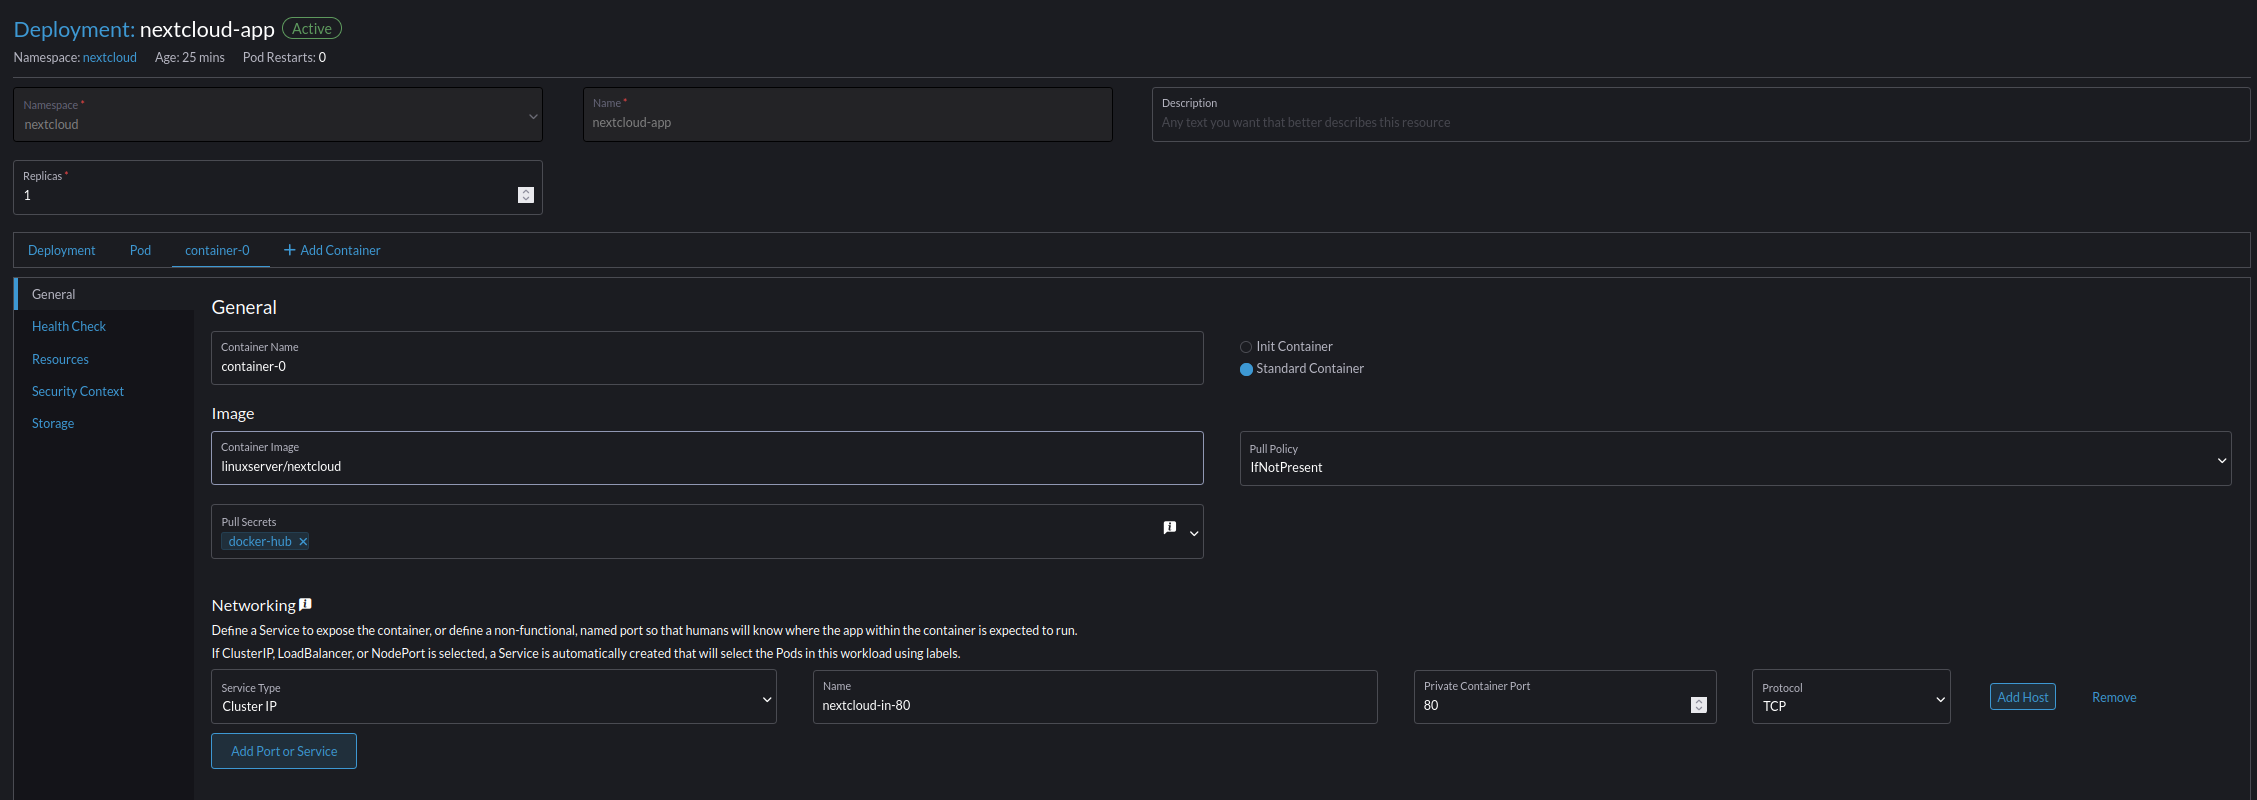
- Navigate to the "Deployments" page and select "Create" to create our first application for deployment.

- Set the following parameters to get the nextcloud application running:
- Namespace nextcloud
- Name nextcloud-app
- Replicas 1
- Container Image linuxserver/nextcloud
- Pull Policy IfNotPresent
- Pull Secrets docker-hub
- Networking -> "Add Port or Service"
- Service Type Cluster IP
- Name "nextcloud-in-80"
- Private Container Port "80"
- Protocol "TCP"
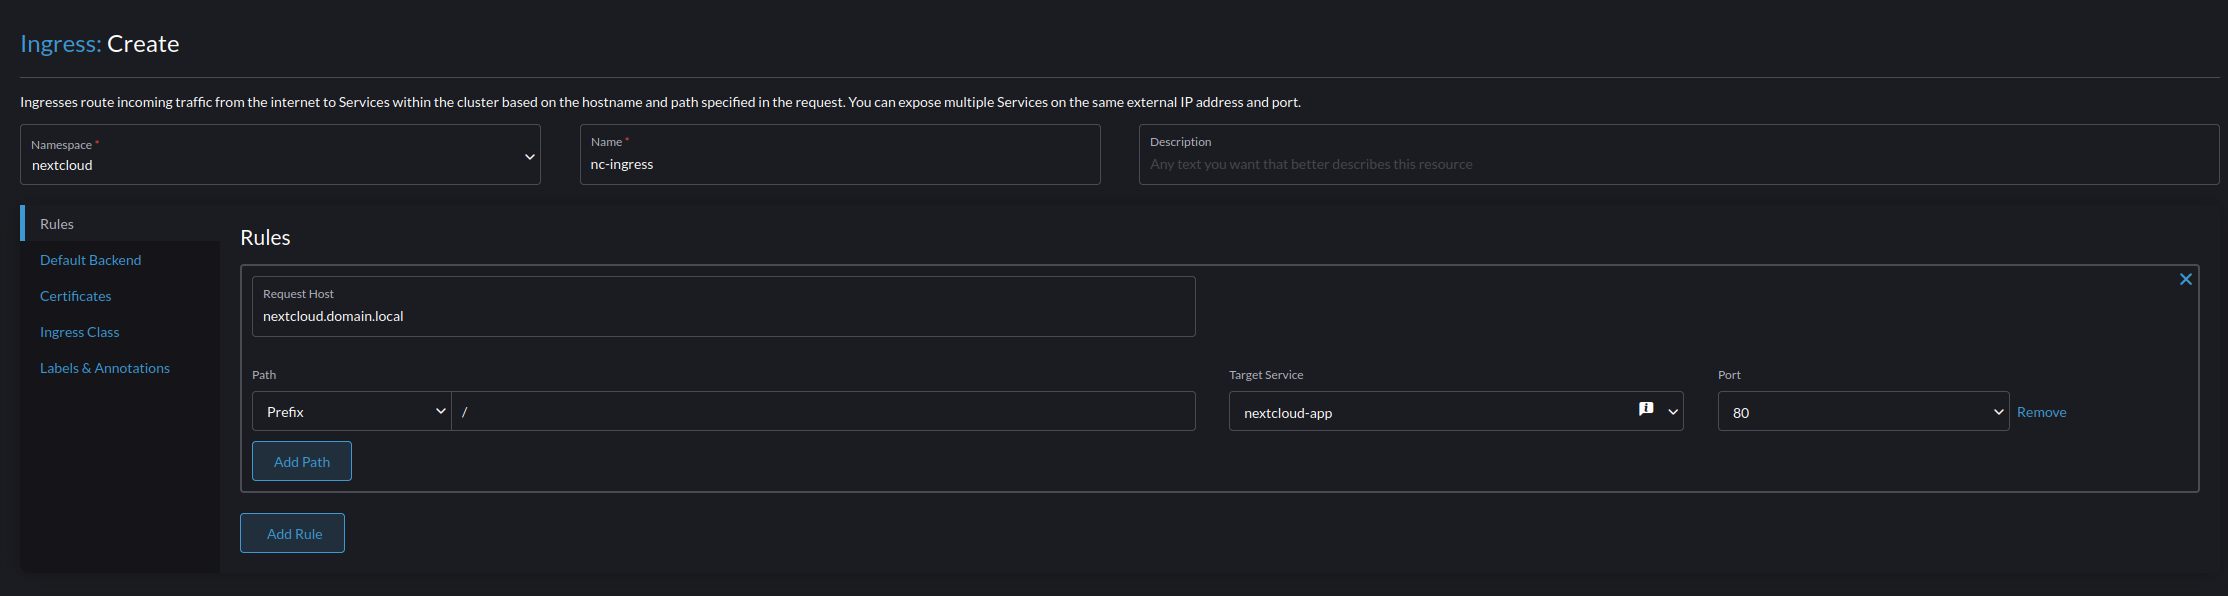
- Navigate to Service Discovery -> Ingress and create an ingress for the network service we just created for NextCloud

- Set the following parameters
- Namespace nextcloud
- Name nc-ingress
- Requested Host nextcloud.domain.local (Your desired HostName)
- Path Prefix
- Path Item /
- Target Service nextcloud-app
- Port 80
- Now navigate to the URL you set for your nextcloud (make sure the DNS points to your Rancher Servers), and you will see the screen of successfully deploying you first application on Rancher.
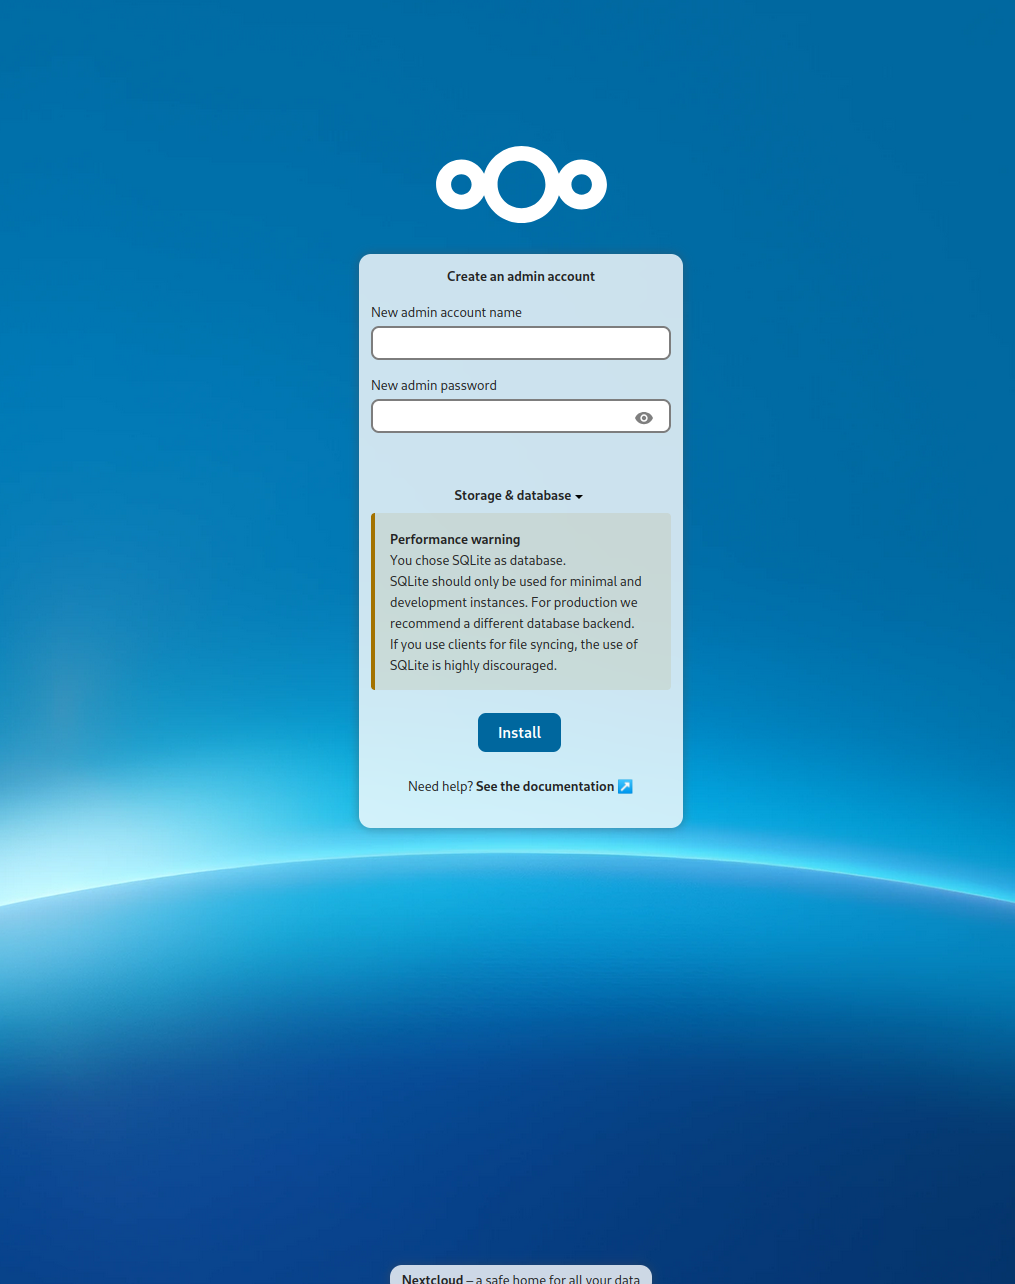
- Congratulations you did it, but this application is still stateless, so every time we do a reboot, or the container is restarted we will lose all of our data. To resolve this we will need to learn the final boss of our Kubernetes journey Longhorn.
Longhorn - Lets Get Persistent!
Longhorn is a distributed block storage system for Kubernetes, as we discussed above this is the foundation for replicative storage in Harvester. This storage system is achieved by running kubernetes pods on the nodes in the cluster that expose certain amounts of the block storage. This exposed block storage is then combined and redundantly maintained by Longhorn so that the needed storage is available on each of the nodes as necessary. Then the storage on each node is passed to Kubernetes through what is functionally a "virtual mount" managed by Longhorn to be transparent to the pod or container.
To setup Longhorn on Rancher do the following:
- If you didn't use openSUSE Leap Micro 6.1 or SLE Micro 6.1, check the dependencies here.
- Navigate to the Cluster you want to install this on. In our case that will be "default", and Navigate to Apps -> Charts, and select "Longhorn"
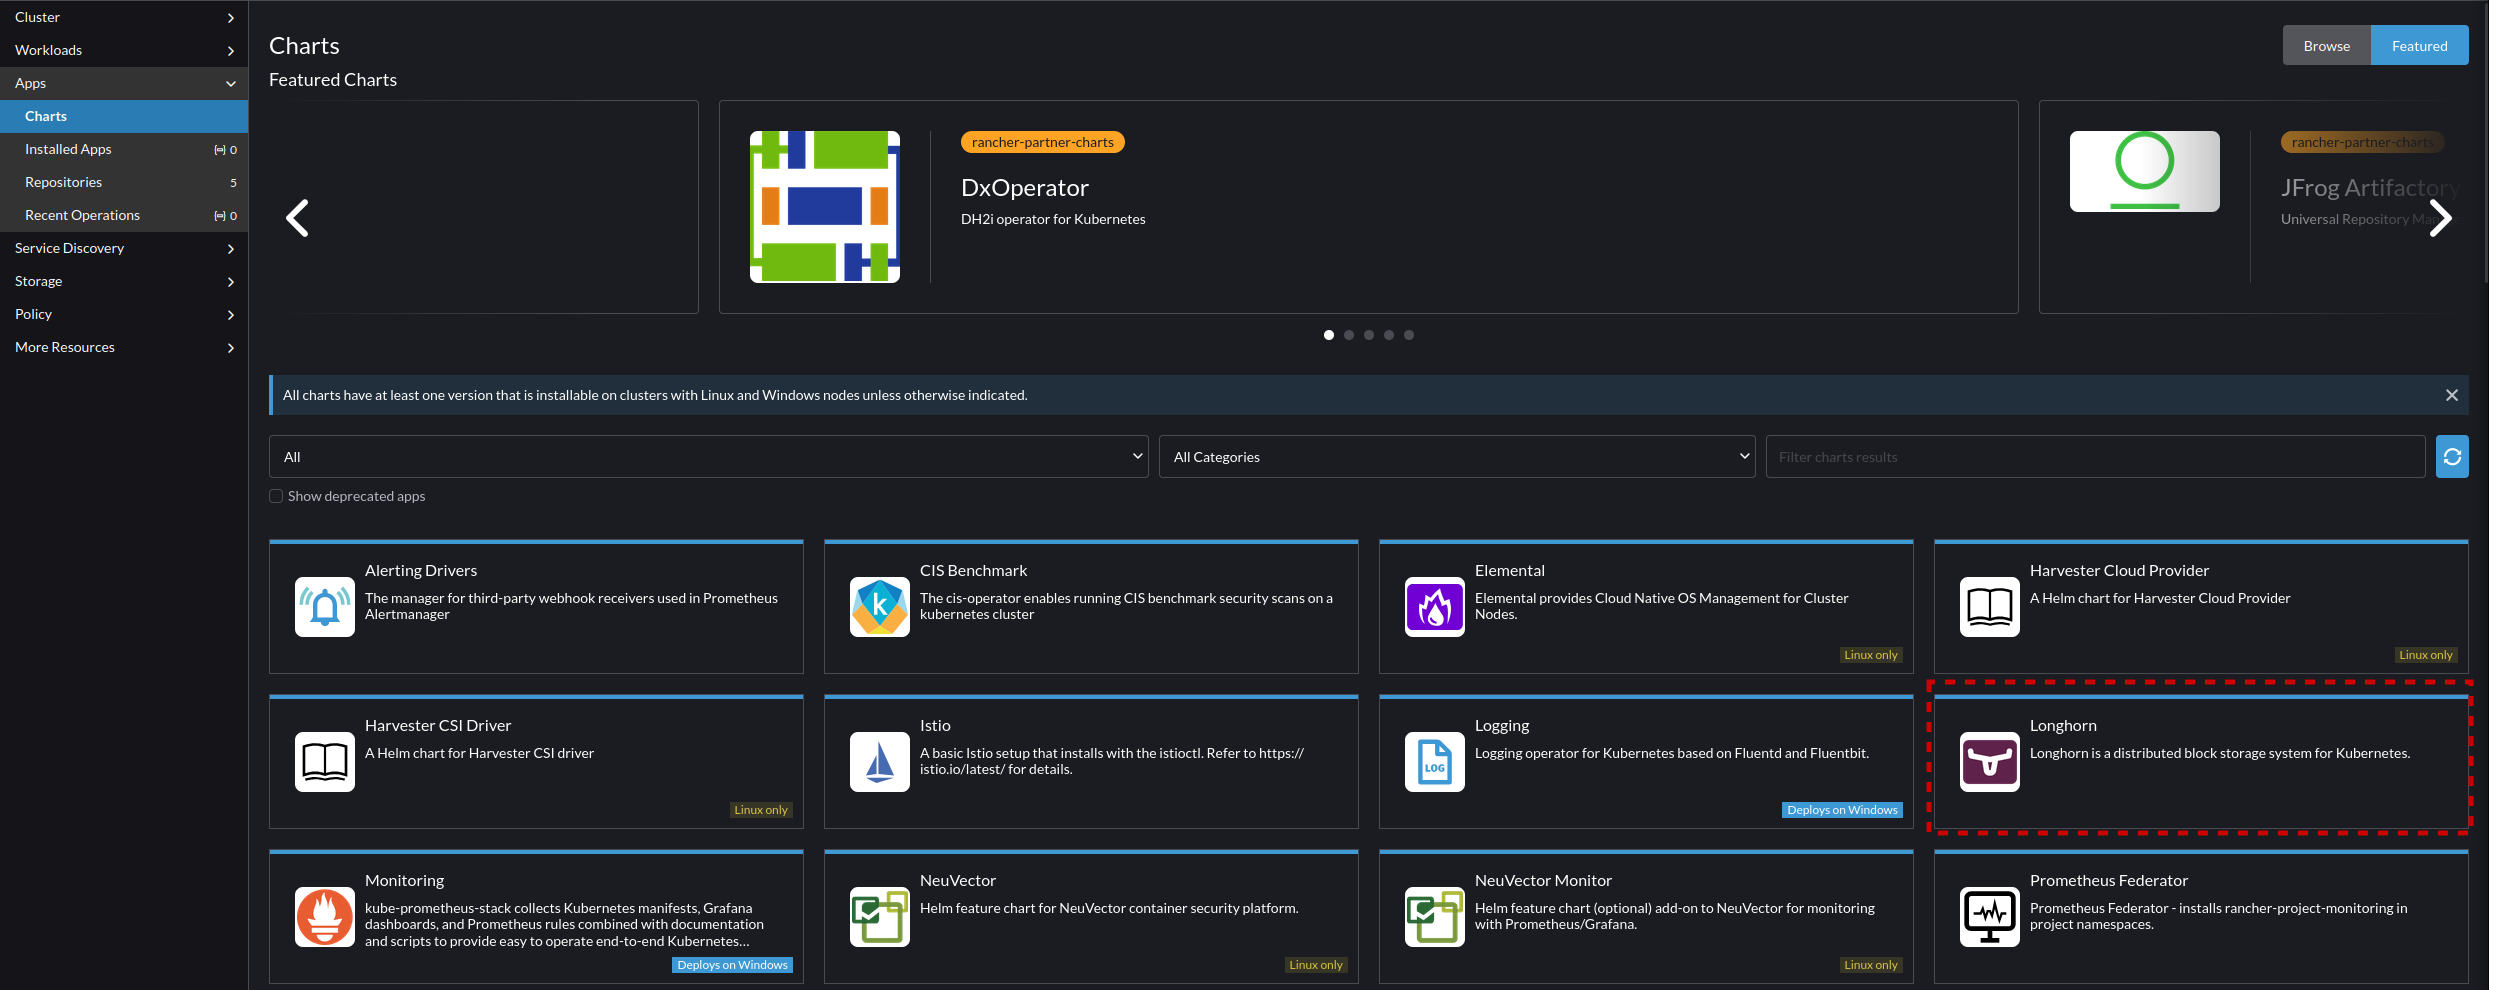
- From the application page select "Install"

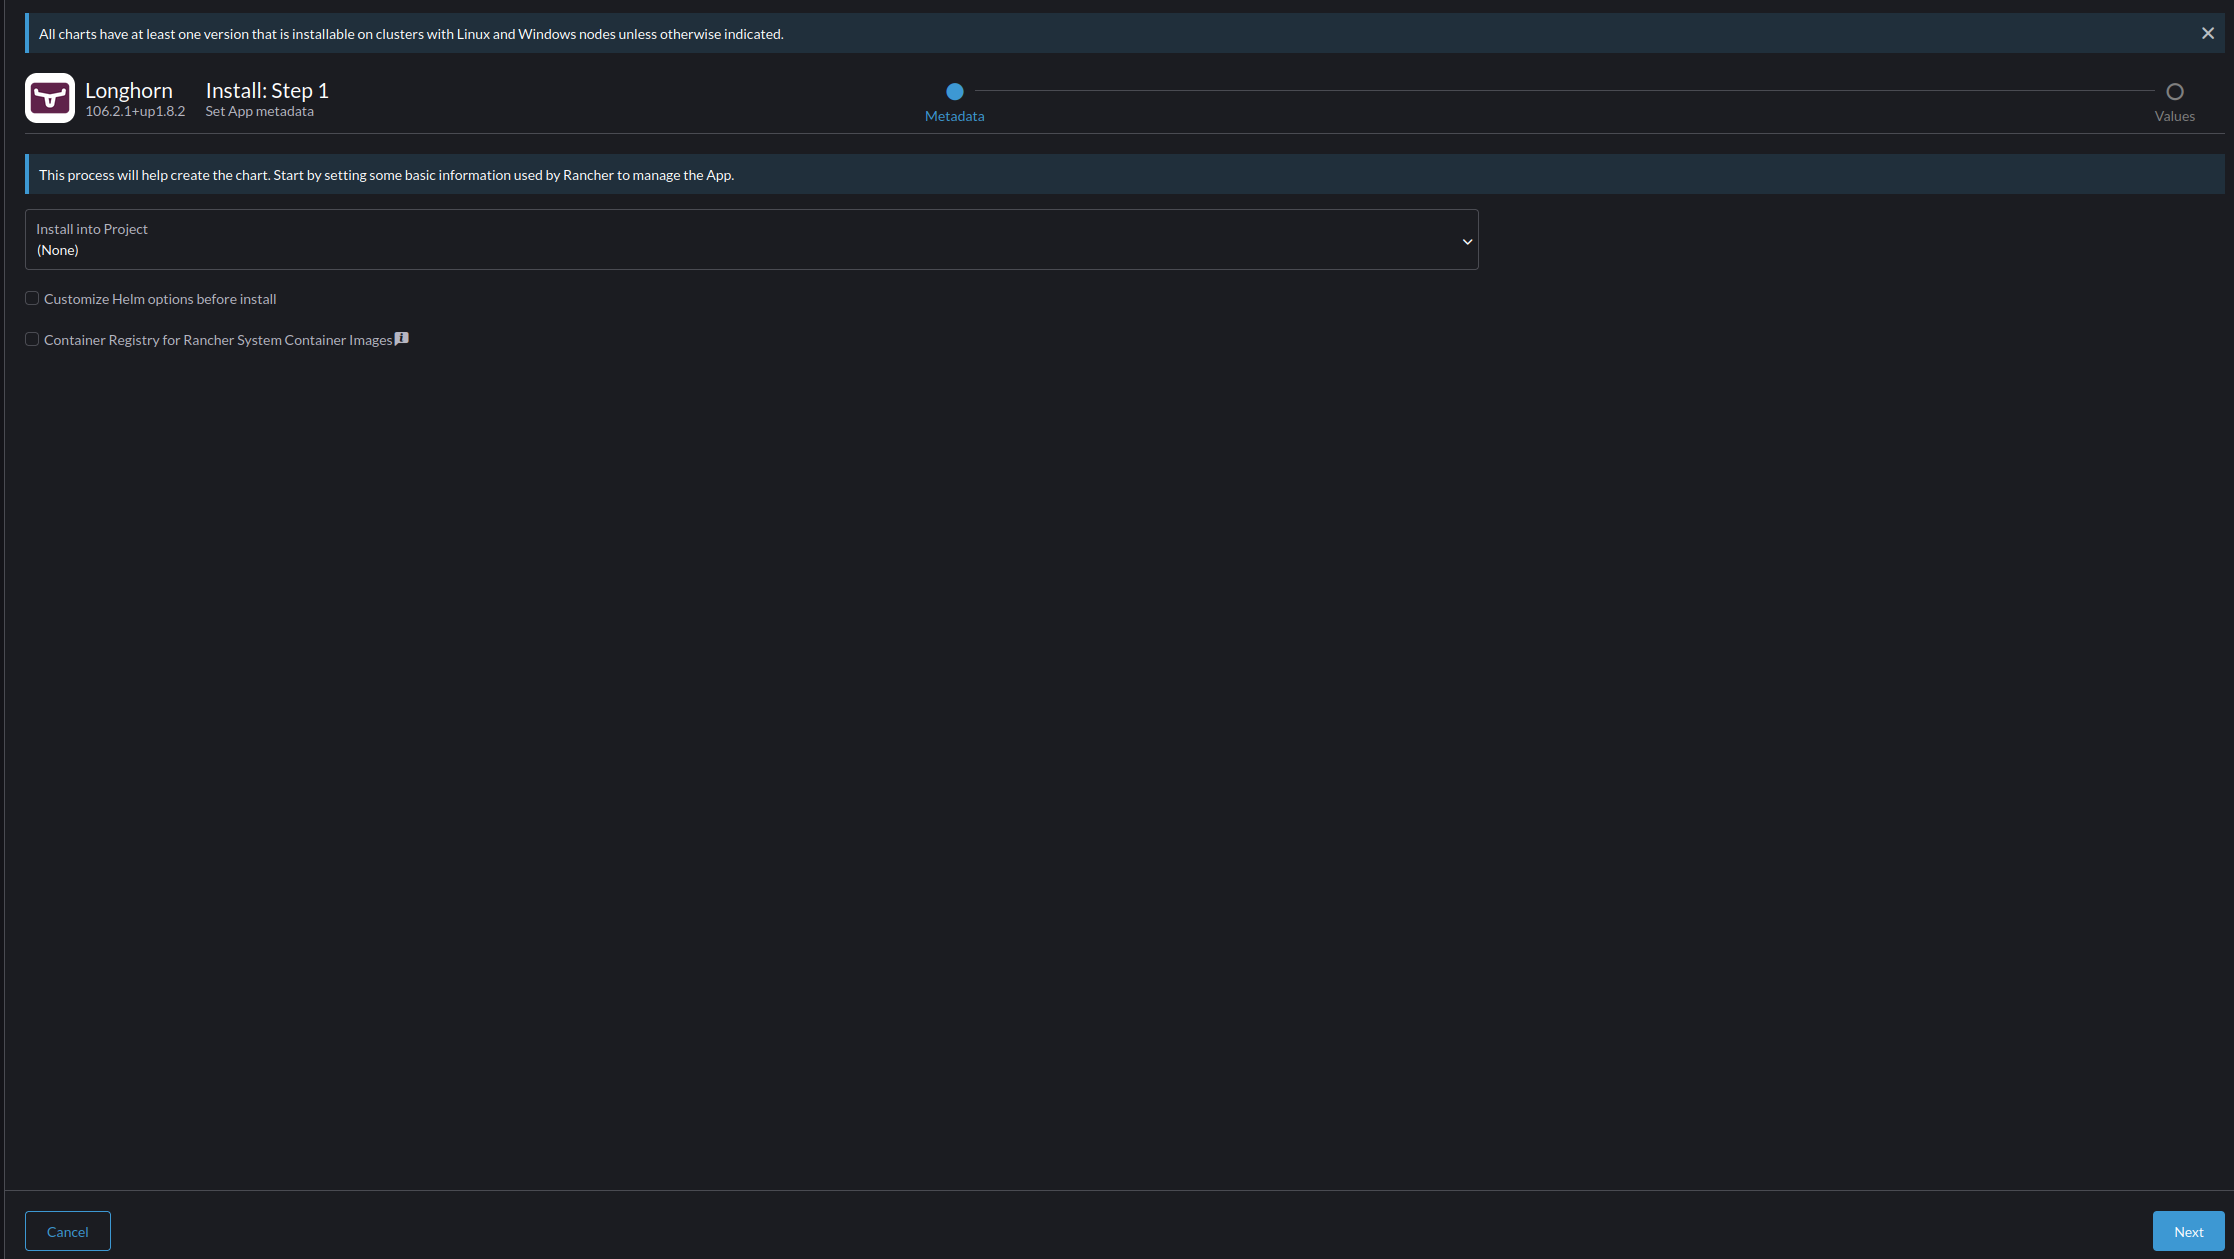
- Select "Next" to proceed, leaving the project assigned as "(None)"
- Monitor the Process in the terminal that appears, when you get the result of "Longhorn is now installed on the cluster!" Wait a few minutes for the secondary processes to run, and then Select the new "Longhorn" menu option that has appeared on the cluster's menu list.
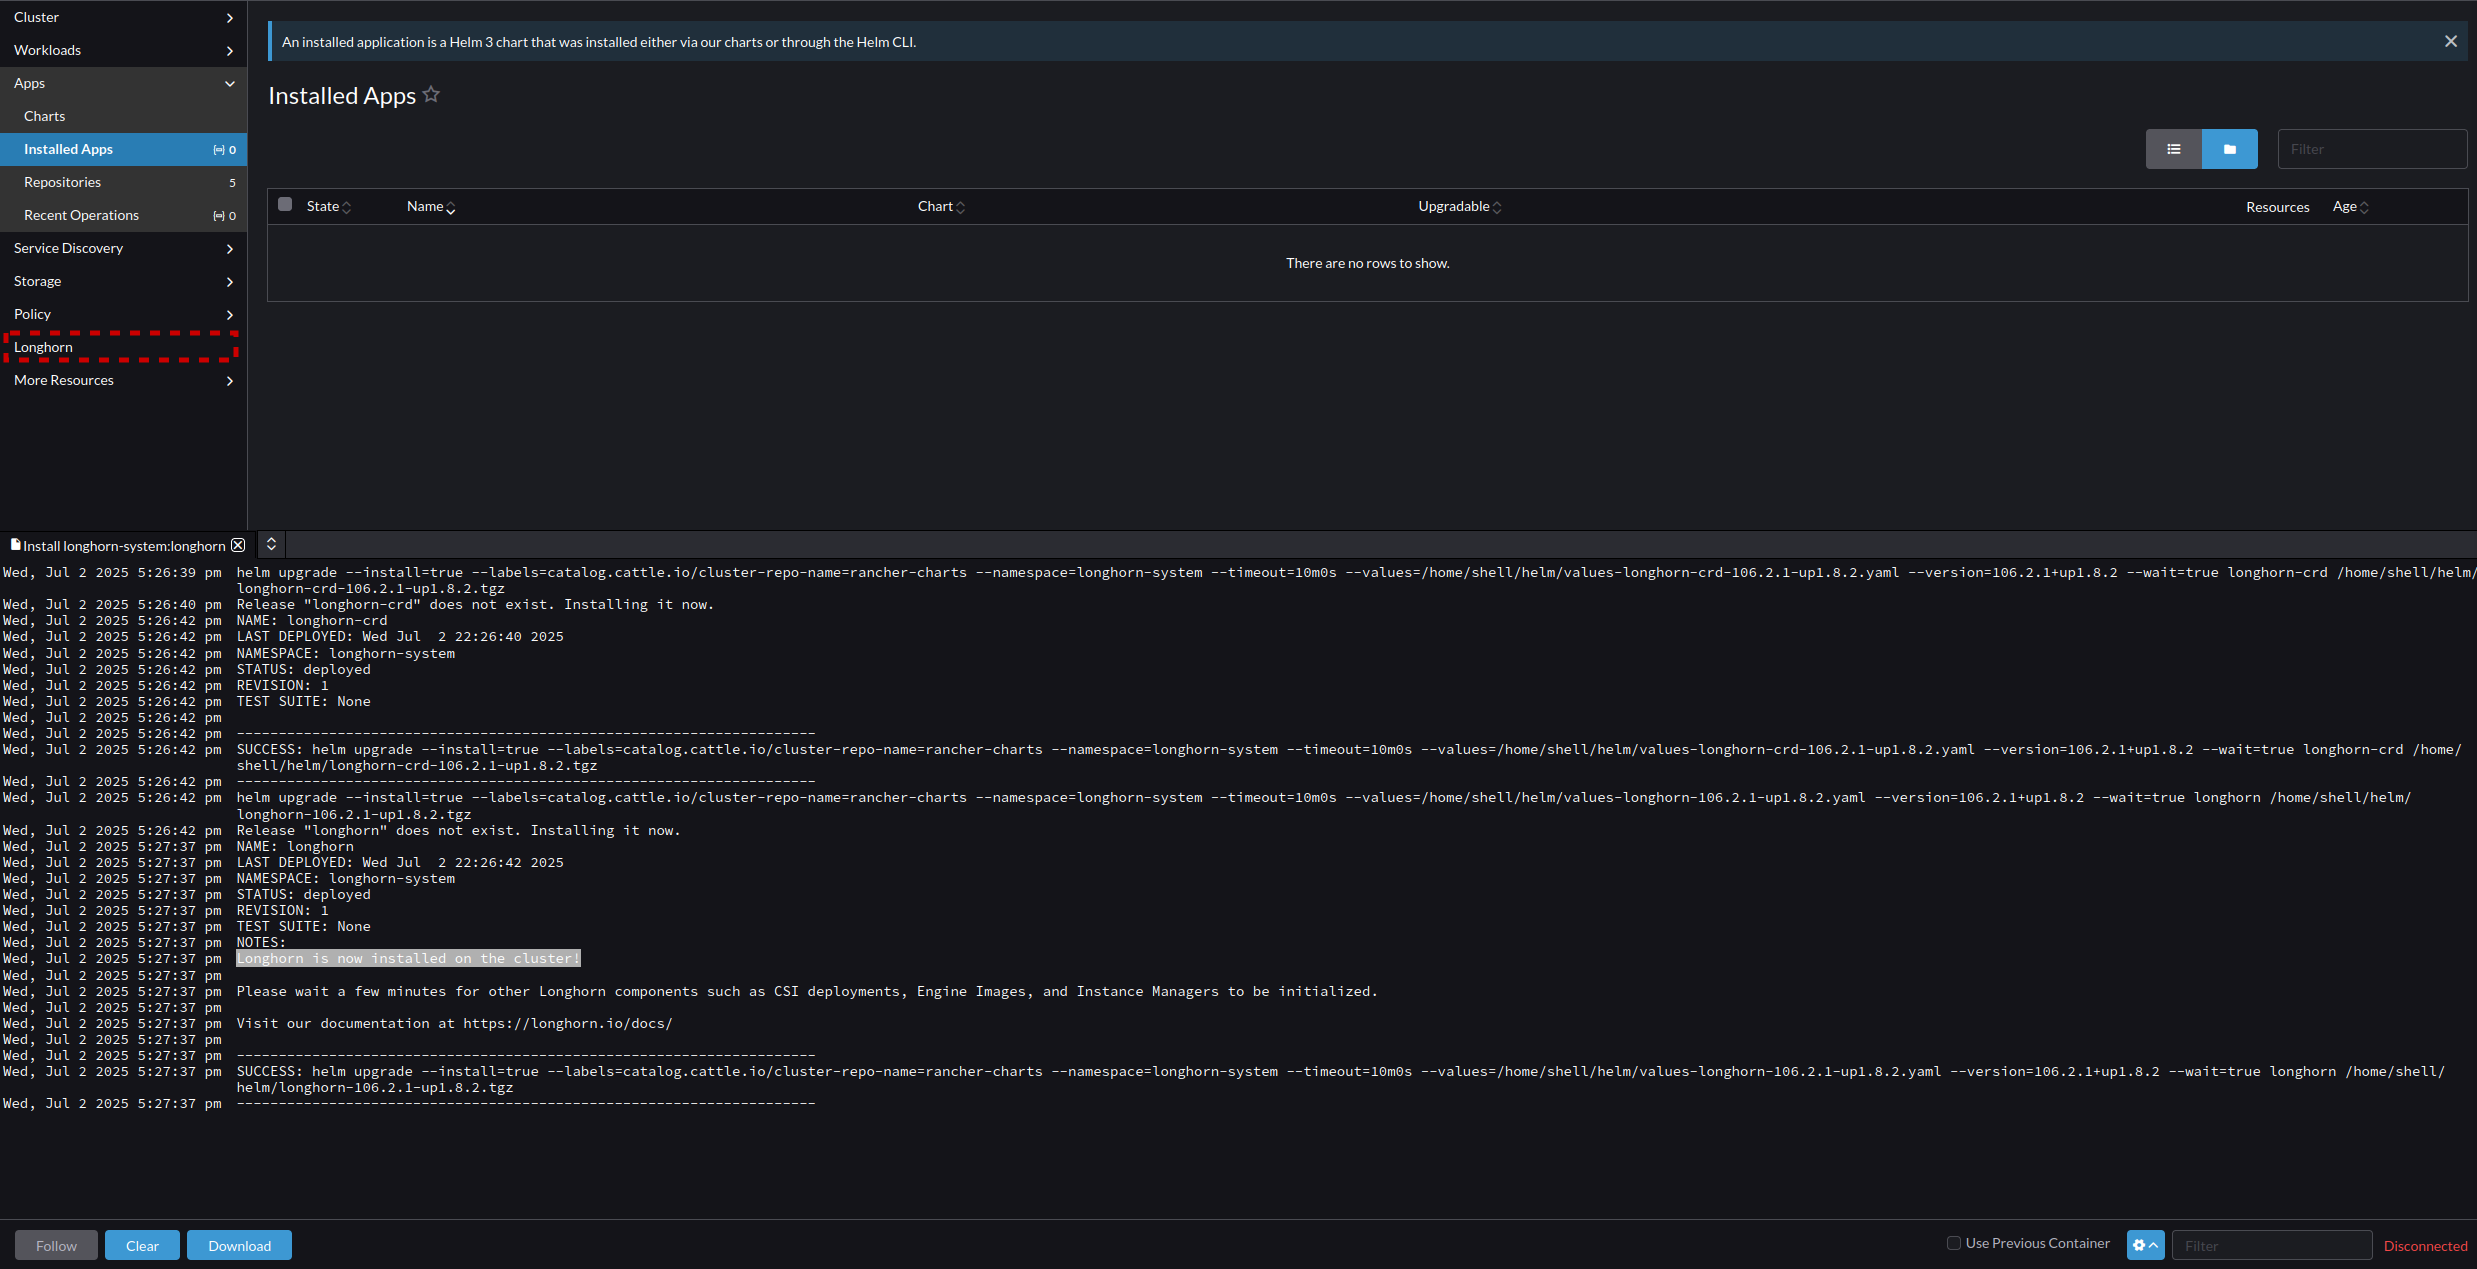
- From the Longhorn Menu, select the "Longhorn" item to open it.

- This takes you to the Longhorn storage dashboard. This Dashboard allows you to manage Longhorn as an independent service.

Longhorn - Navigating the Basics
Longhorn operates on the same premise as Harvester and Rancher, but it directly exposes the management of the system storage in a way that is redundant and manageable. The menu breaks down as follows:
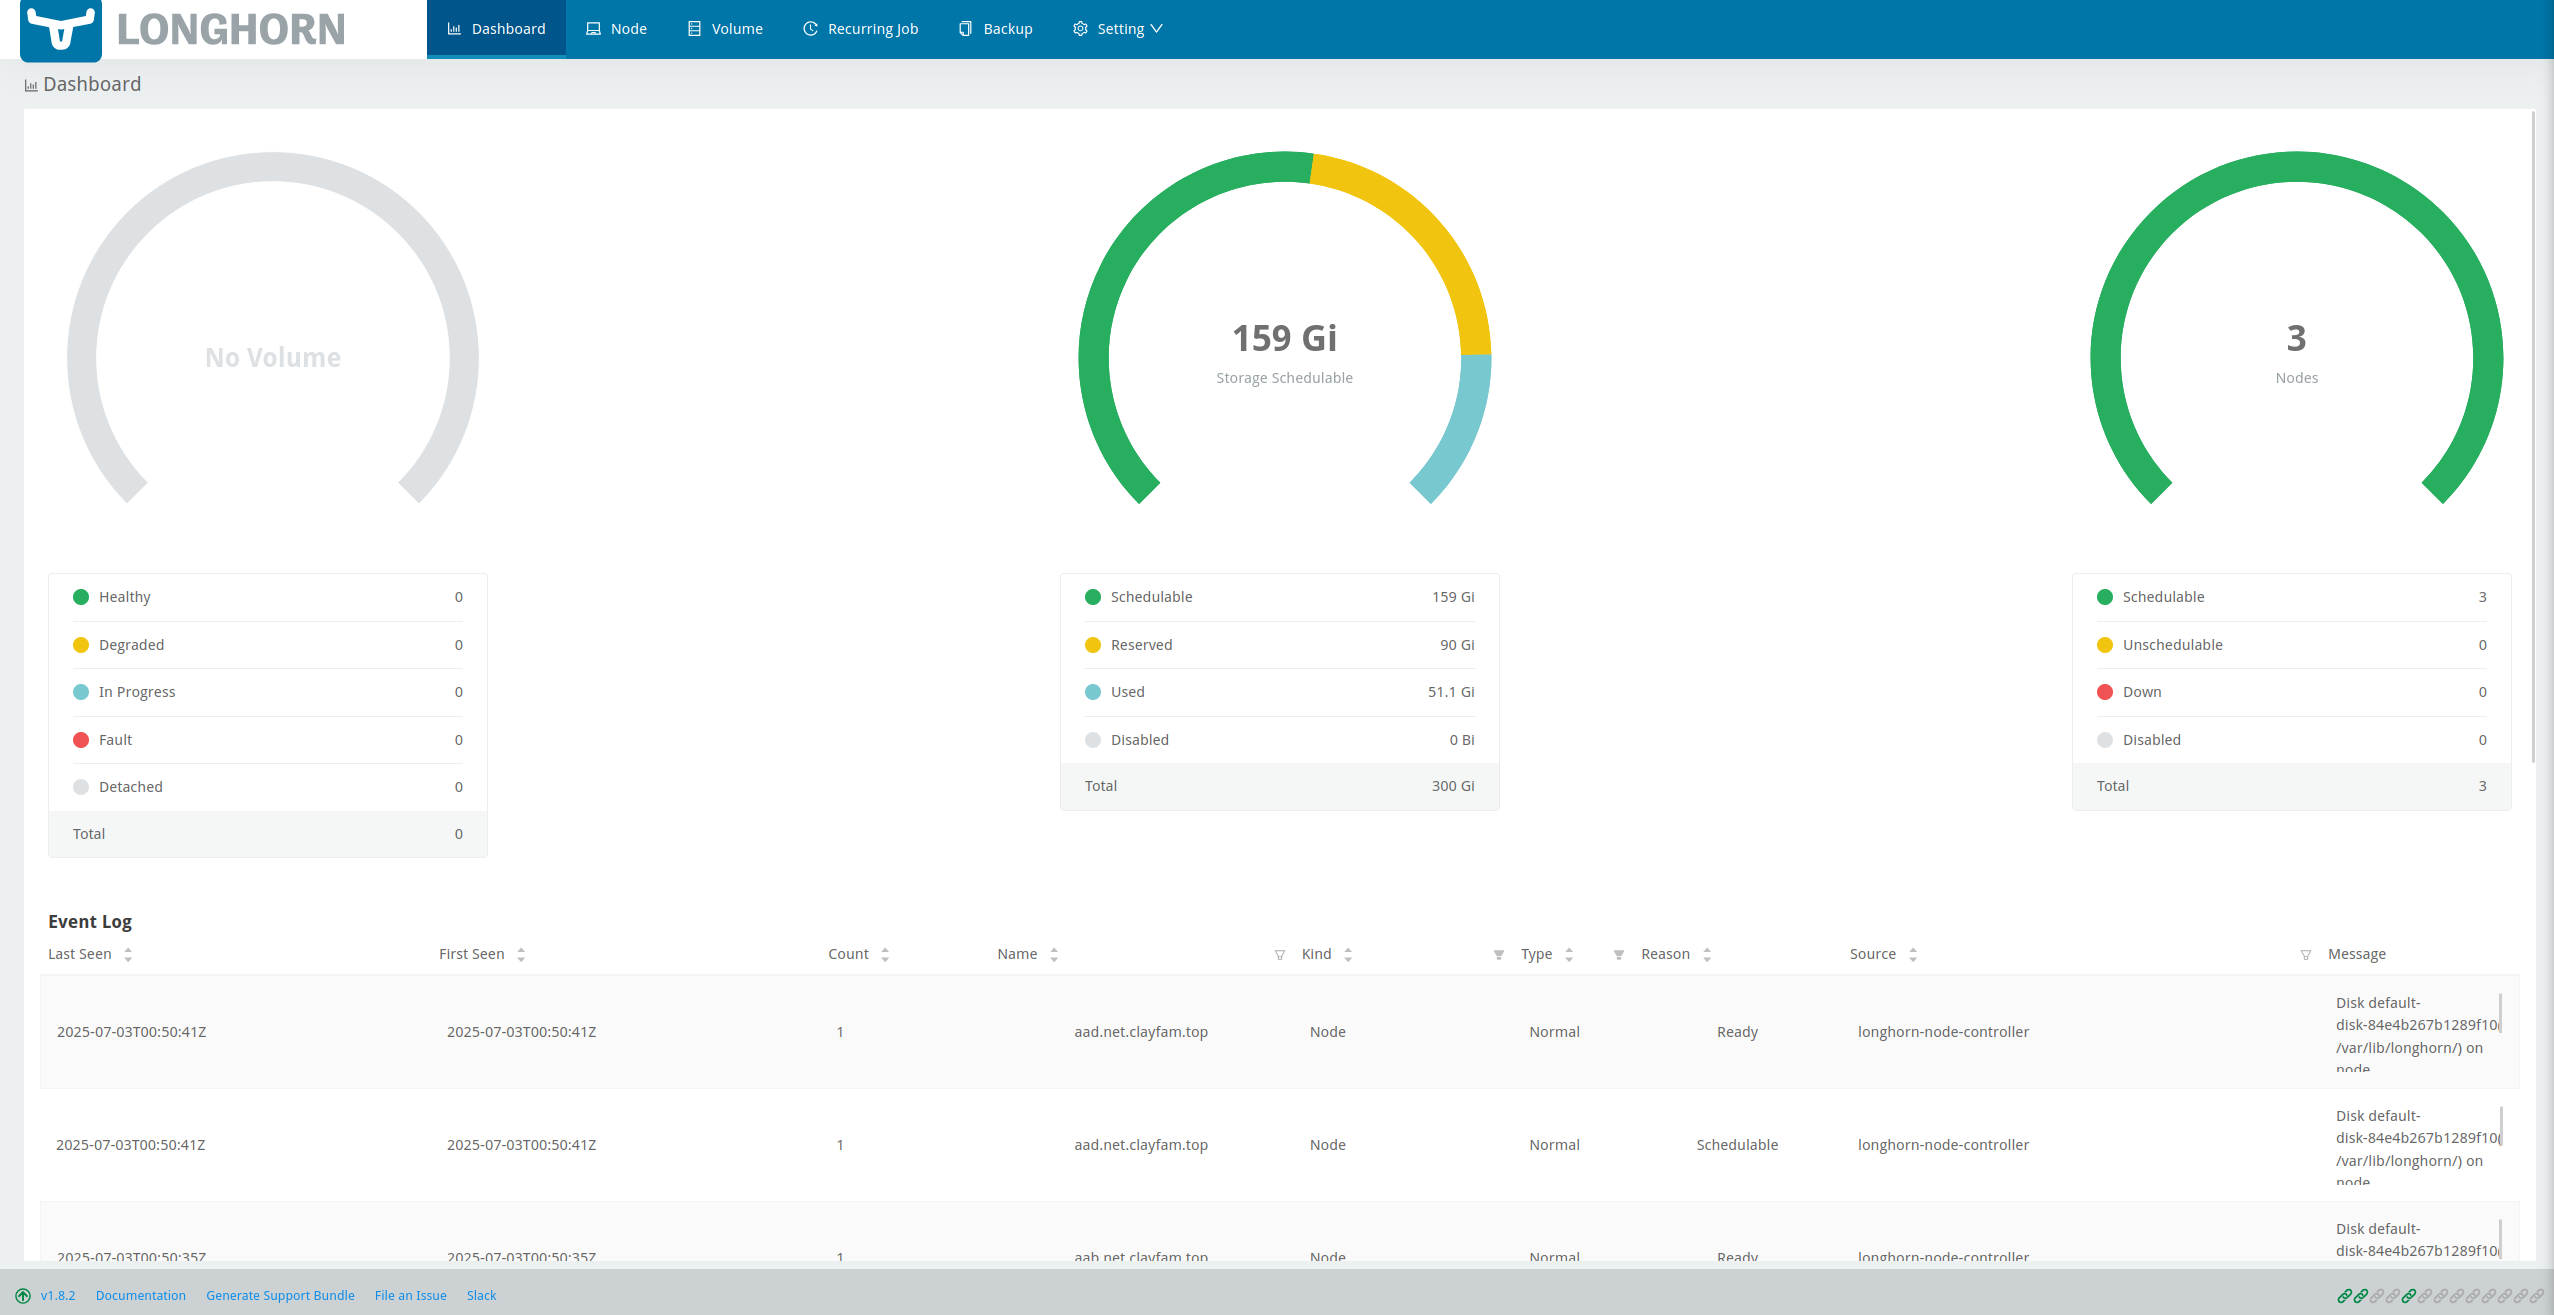
- Dashboard
This screen shows you the the amount of space, nodes, and volumes, as well as their health. The bottom of the screen shows standard Event Logs. For normal usage the left two charts are the most important. The far most left chart shows the status of volumes for you to monitor when things get degraded or fall into a fault, while the middle section shows you the amount of available storage and its schedulability. The important thing to keep an eye on is to not exceed your scheduled to used to reserved space, as Longhorn does support over provisioning.
- Node
The node screen lists and allows you to to configure each node. This is where you would go for things like setting system file paths, adding disks to a node, and setting the storage reserved space on each node.

- Volume
This volume screen allows you to create and manage volumes. Volumes are what are presented through Rancher to a specific Pod or Container and holds your data.

- Recurring Jobs
Recurring Jobs can be used to do periodic data snapshots, backups, deletes, cleanups, or trims of volumes on specific intervals. This is essential as your system grows to ensure that you data remains redundant, and backed up.

- Backup
Backups can be pushed to an S3 bucket or a NFS share. Use this page to manage what is backed up to where for both volumes and images.

- Setting
The Setting Contains the following Sub-Menus- General
Go here for standard settings such as Metrics, and concurrency - Engine Image
This allows you to manage the Engine Image used for Longhorn, for the most part you will manage this through helm in Rancher and not here. - Orphaned Data
If you orphan data it will end up in this page. Keep this in mind as you do your initial learning and lose track of items. - Backing Image
Backing images are functionally Disk Images, these can be used, and backed up to create new volume templates, or image templates. - Backup Target
The most used sub-menu, this is where you set target information for S3 or NFS locations. - Instance Manager Image
This will list the instance manager for each of your nodes and its current state - System Backup
This is the disaster recovery zone. System Backup focuses on backing up the entire system instead of just specific disks and images. In production systems ensure this is setup properly to help protect against catastrophic failure, or recover from it.
- General
Longhorn - Deploy Persistence to a Volume
Longhorn creates and shares volumes with your Rancher system. Today we are making our nextcloud deployment persistent so we can deploy multiple replicas for fail-over and have the data survive a redeployment. To get there we must first create a volume by:
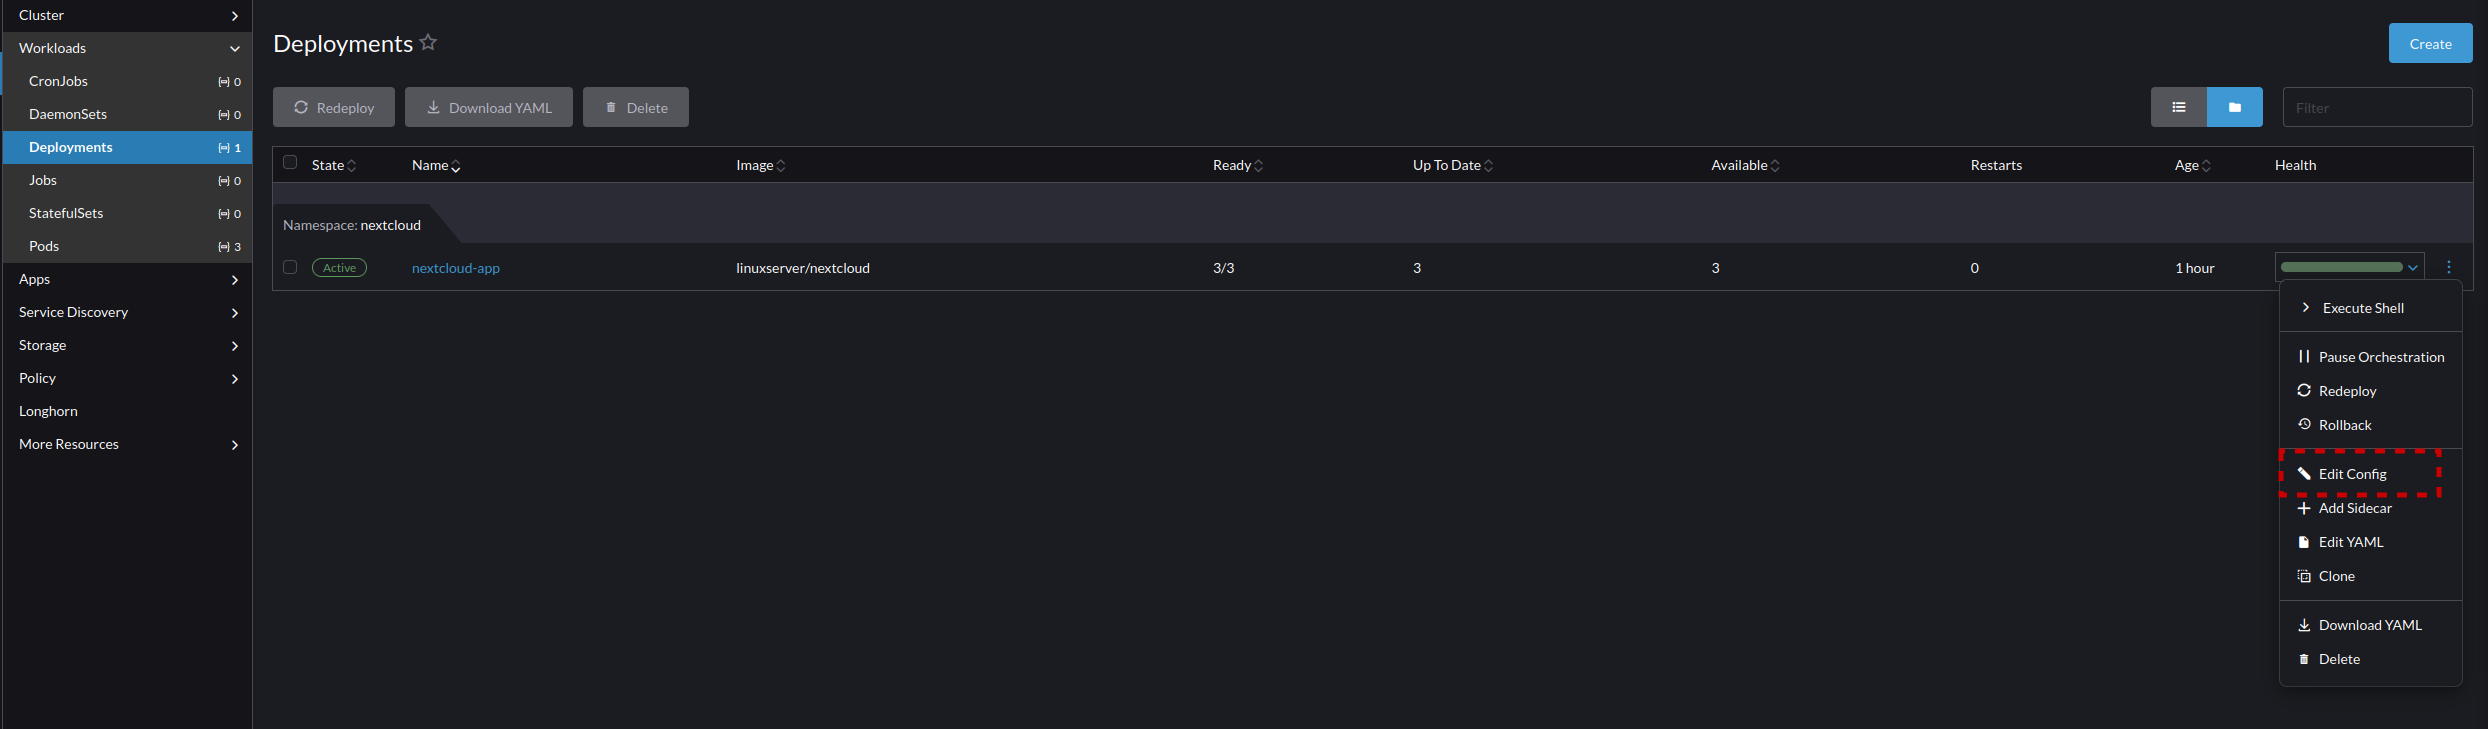
- Longhorn volumes can be directly managed in the Longhorn WebUI, and you should learn to manage these volumes here as it will help you in learning what is going on and how to diagnose issues. But for this lesson we are using the configuration in Rancher which communicates automatically with Longhorn when setup like this. So we will make our volume claims by going back to the Rancher menu and selecting Deployments -> nextcloud-app -> Edit Config
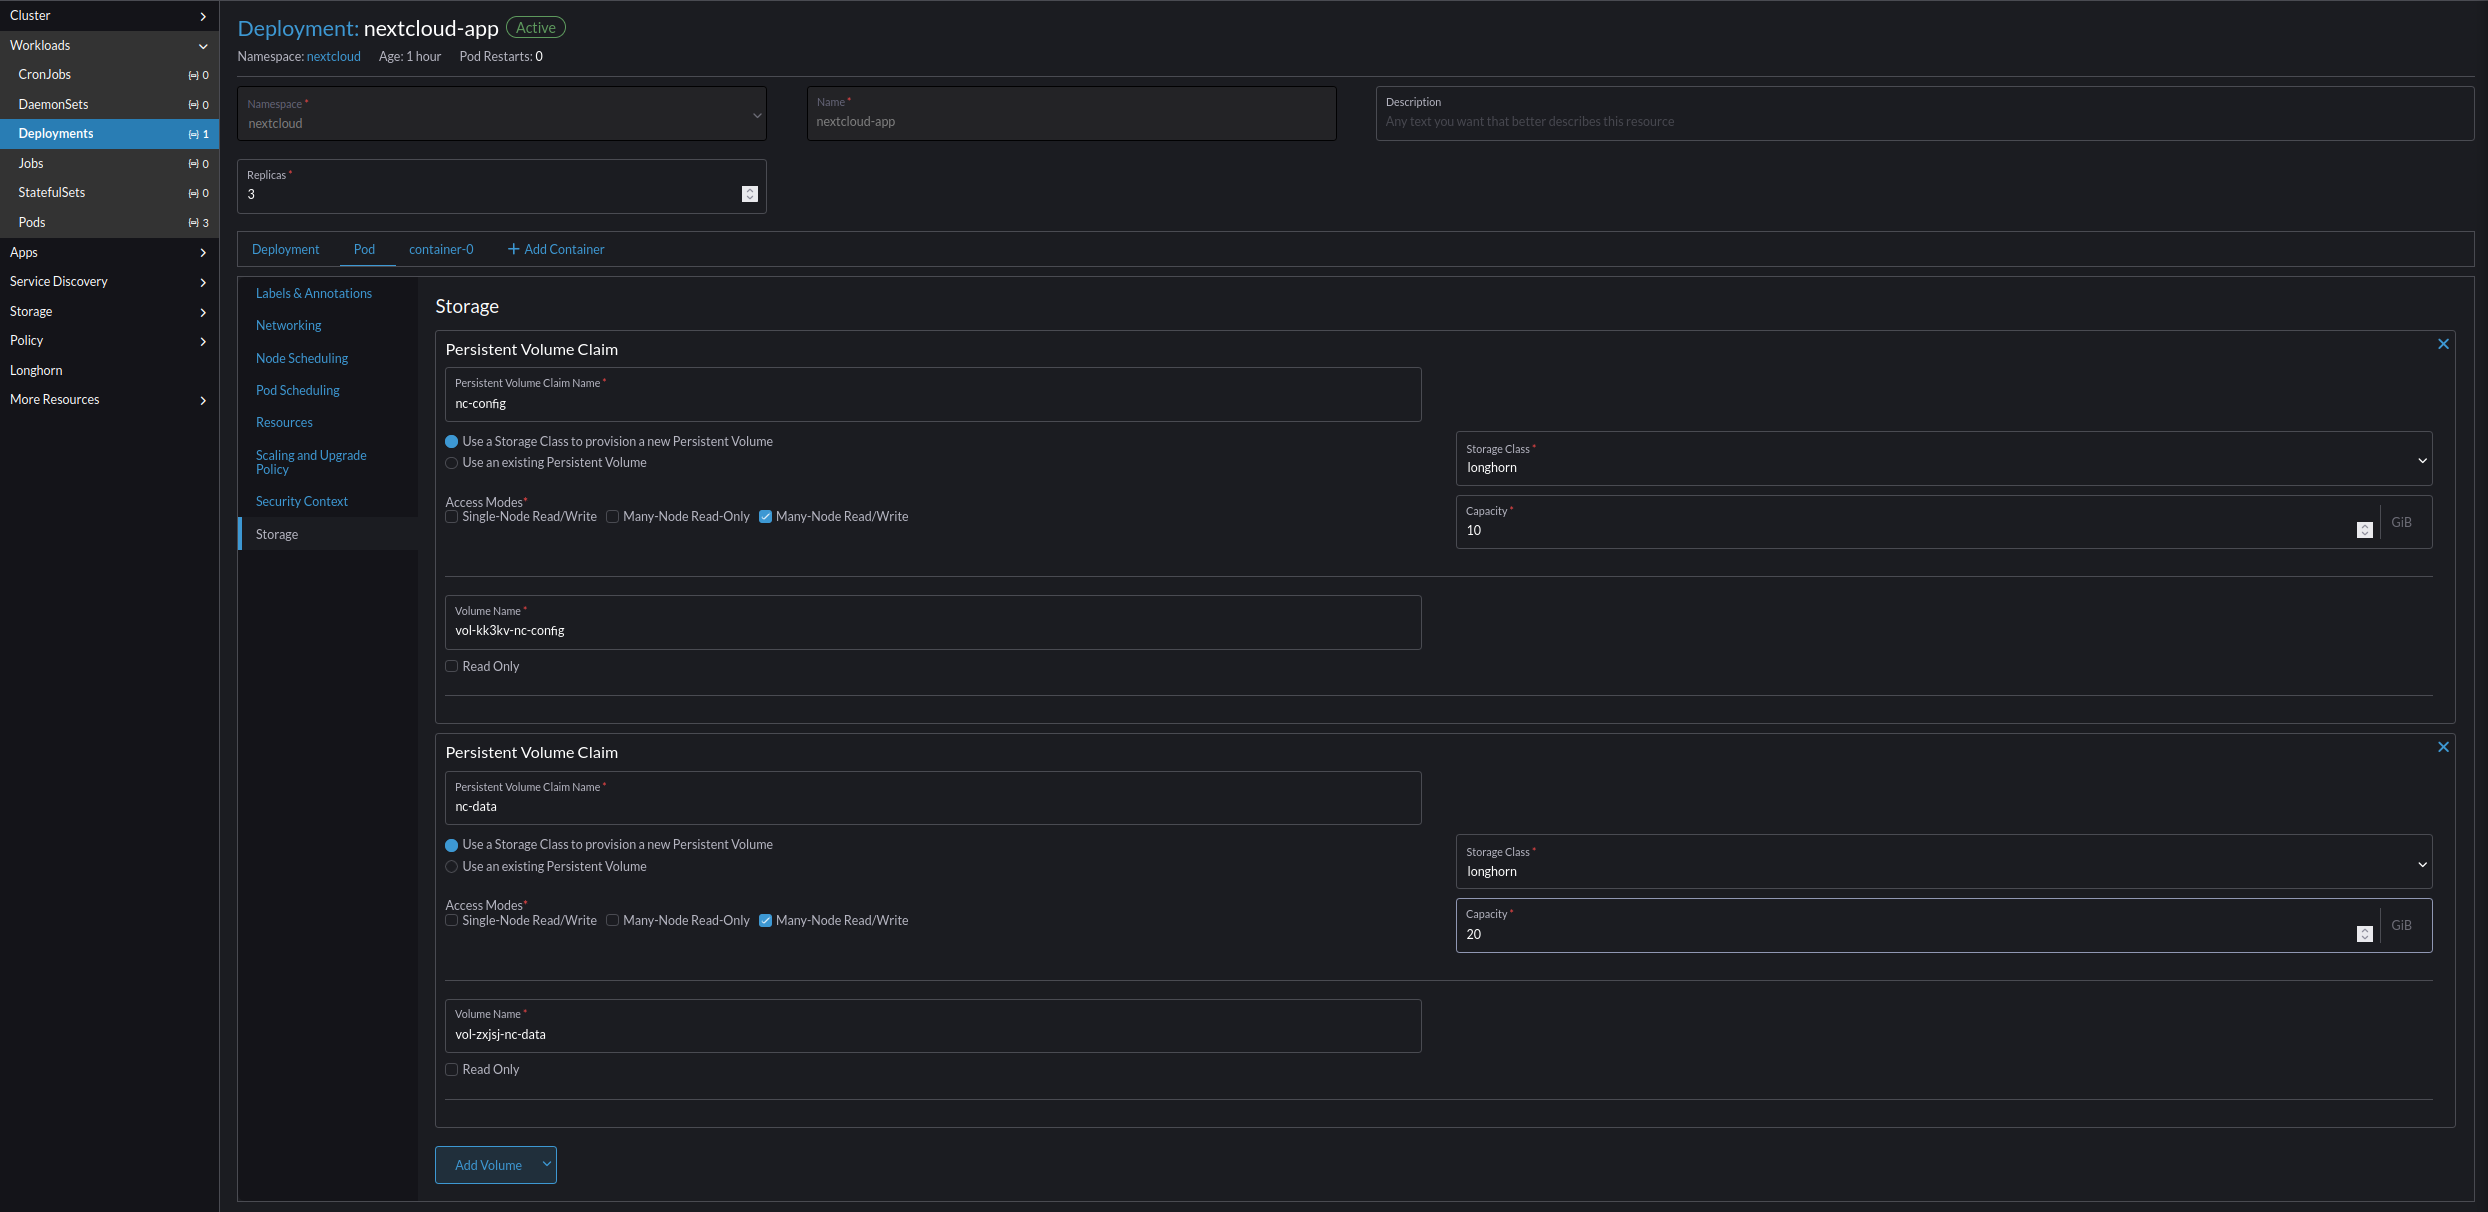
- Go to Pod -> Storage -> Add Volume -> Create Persistent Volume Claim and create two volumes:
- Next Cloud Config Volume
- Persistent Volume Claim Name nc-config
- Use a Storage Class Class to provision a new Persistent Volume True
- Storage Class longhorn
- Capacity 10 GiB
- Volume Name (auto created string)-nc-config
- NextCloud Data Volume
- Persistent Volume Claim Name nc-data
- Use a Storage Class Class to provision a new Persistent Volume True
- Storage Class longhorn
- Capacity 10 Gib
- Volume Name (auto created string)-nc-data
- Next Cloud Config Volume
- Go to container-0 -> Storage -> Select Volume -> (auto created string)-nc-data && -nc-config.
- (auto created string)-nc-config
- Mount Point /config
- Sub Path in Volume Empty
- Read Only False
- (auto created string)-nc-data
- Mount Point /data
- Sub Path in Volume Empty
- Read Only False
- (auto created string)-nc-config
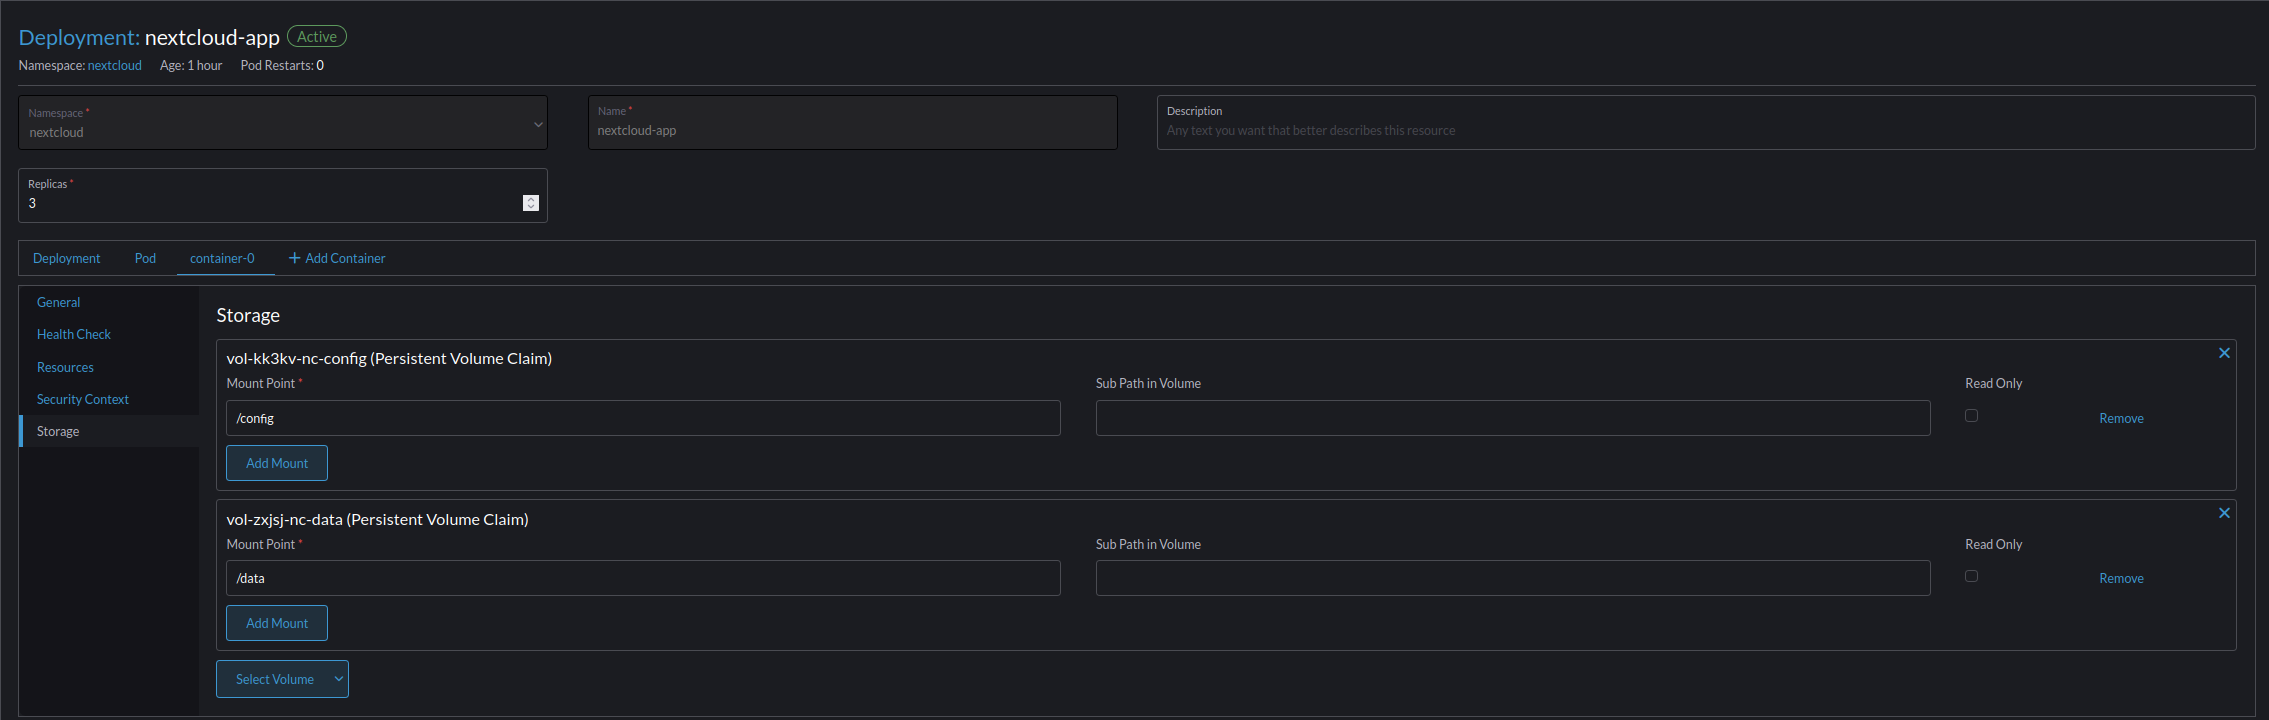
- Select Save and wait for the unit to reload.
Congratulations!!!!!!
You survived a full implementation of Harvester, Rancher, and Longhorn!
You're ready to conquer the world, or maybe just edge computing.
Now go take a nap, and come back again to learn more on how to manage the large difficult world of Enterprise computing.